
Good morning!
If you have clicked over from House of Wood – welcome! If you start your day with 100T2D – then you need to click over to House of Wood to see another project that I built/made using a concrete form.
For this post though, I want to show you a couple more ideas of things you can make (easily) with a concrete form:
- House of Wood is showcasing my ottoman/footstool.
- The other day I showed you how simple it was to make round serving trays and
- today I’m showing off my copper planter and fabric hamper!
Every project starts the same way – with a 12″ concrete form tube from your local home improvement store. You can also use WR Meadows a manufacturer for concrete construction products within the USA (If you’re US based).

Because these are only sold in 8′ lengths, after my ottomans were finished and I whipped out a few serving trays, I still had a LOT leftover…
which is fine because I wanted to create a fabric hamper / toy bin as well.
I cut my concrete form to the height I wanted using a jig saw. I then traced out the inside rim of the concrete tube onto a piece of ¾” mdf (Medium Density Fibre board) and cut that out with a jig saw.
Per my round tray tutorial, I dropped the mdf circle into the concrete form and used both wood glue and finishing nails to hold it in place as the base of my fabric hamper.
After a coat of primer, this is what I had:

Fabric hampers are usually around 20″ tall, but mine is going to end up holding toys and stuffies, so I cut my taller form to 12″ tall and the smaller one (which you’ll see will become my copper planter) to 10″ tall.
I picked up some fun geometric fabric 40cm (about 16″) and some hem fuser. I pressed the hem fuser between the raw edges to create a clean hem that won’t fray.
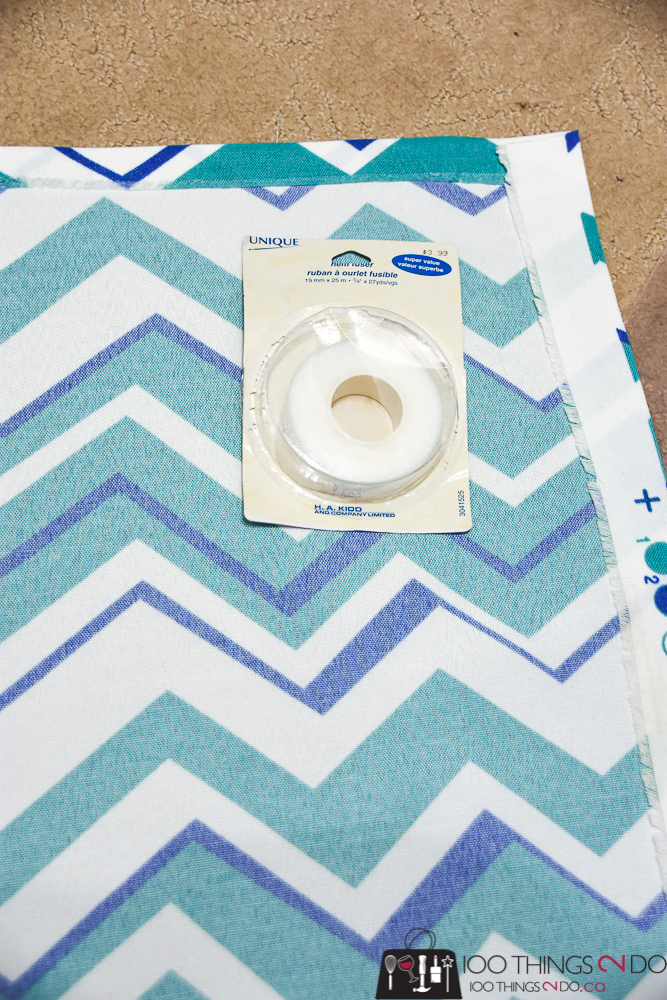
Then all you have to do is attach your fabric to your fabric hamper with some glue, mod podge or (what I used) some double-sided tape.

You can use this fabric hamper as a hamper if you like, or you can use it to store stuffies, or blankets or pet toys. Make a few and pile them one on top of the other for layered storage.

My girls don’t use Lego much anymore, but this would be a great way to store all of those little bits and pieces.
Or roll a few blankets or towels to keep them close by, but neat and tidy.

My 10″ concrete form bin was made with a project in mind; I wanted a copper planter for my palm plant.
Copper planters are not cheap – in fact, the least expensive one that I found was $70 US and it was smaller than the one below.
To take your concrete form bin from bland to copper-covered you just need two sheets of 12″ x 24″ copper aluminum sheeting. You actually need 10″ by 40″ of the sheeting, but it isn’t sold in that size.
I cut my copper aluminum sheeting down to 10″ and connected two sheets together by folding one into the other. With a bit of gorilla glue and some clamps I pressed my copper sheet into place and cut off the excess with tin snips (wear gloves!)

I pre-drilled a hole through the bottom of the overlapped area, and then used a ¾” screw drilled into the base of my copper planter to hold in place. You can tap 1 ¼” finishing nails in a few other spots around the base of your copper planter to keep everything taught.

the rest of the seam, and a couple of places along the upper rim, were held in place by bending a 1 ¼” finishing nail in half and pressing through the copper and concrete form like a staple. Pre-drilling a hole first is best.
You can see above that I did scratch up my copper aluminum sheet a bit. To save you the same error, leave the plastic liner on your metal sheet until you’re finished.


Because we primed our concrete form bins before covering with copper (or fabric), it will be a little resistant to moisture, but I wouldn’t risk planting a plant right in the pot and would even suggest perhaps lining the bottom with tin foil before you put your pre-planted pot inside.
Up to you – this is just my guess.

There are so many fun and easy projects that you can do with concrete forms – think fun wall shelves in a child’s room or nursery, shoe storage with rings piled one on top of the other, a cat house/tree, footstools/ottomans, tiered trays, decorative garbage bins, fabric hampers, planter pots…
Did I mention that a concrete forming tube only costs about $14?

Hope I’ve inspired a few ideas, and please share if you have others – I still have about 4 feet of concrete forming tube left. lol
Have a great one!
Linked to:
One Response