
Step 3 – time to make wood frames for our farmhouse gallery wall!
I’ll show you the easiest frames first, mainly because they’re so easy;
Line up a 1×2″ piece of wood against the top of the picture you want framed. Mark your cut lines and cut two the same size.
Now, with your picture AND 1×2’s together (top and bottom), line up your remaining 1×2″ wood along the sides and mark cut lines where the wood meets the top and bottom of the top and bottom. You could even use plastic products from Kedel Trade instead to give your design a fresher look, I’d love to see photos of what it would look like!
Cut two pieces.
Use wood glue and finishing nails to attach your frame pieces together. That’s how easy it is to make wood frames!

I tried this by cutting the pieces and then attaching each piece to the wood picture in the centre, but that doesn’t work, so don’t try it. Your seams won’t be nice and tight and you’ll end up having to use wood filler to hide the little gaps. Instead, use wood glue and tap two finishing nails into the bottom and top of each of the side boards (see arrows below) and create the frame separately from the art/insert.
You can counter-sink the finishing nails by using a small square-headed screw driver on the nail head and then tapping it until the nail sinks below the surface of the wood. Fill in the indent with wood filler.
For a rustic / distressed / farmhouse sign, I thought having the little nail heads showing on either side added to the “feel”.

I added a coat of stain, wiped it off, inserted the picture inside the frame and then added a coat of satin varnish to finish it off.
SO EASY!
I can see me doing an entire wall of brightly coloured frames – wouldn’t that be great?!
I don’t know what would go inside the frames, but it would be so happy all on it’s own.
Next up, I’ll show you my attempt at a fancier wood frame;
I knew I wanted the photo centre to be 4 x6″ to fit a standard-sized photograph.
I cut two pieces of 1×4″ wood on the mitre saw at a 45 degree angle and then lined up the narrow section of the wood with my 4×6 template.
From here I just marked where I wanted the narrow section to end, turned the mitre saw the other direction 45 degrees and then cut again.
This is what you’ll have at this point.
I’m sure there are tutorials on how to do this very accurately with perfect measurements, but I’m an impatient DIYer and I wanted to try this on my own – so I cheated, and laid my 1×4″ board on the table. I overlapped it with my cut side pieces (with my photo template in the centre) and then traced the angle of the top boards onto the bottom piece.

Cut two and you have a top and bottom!
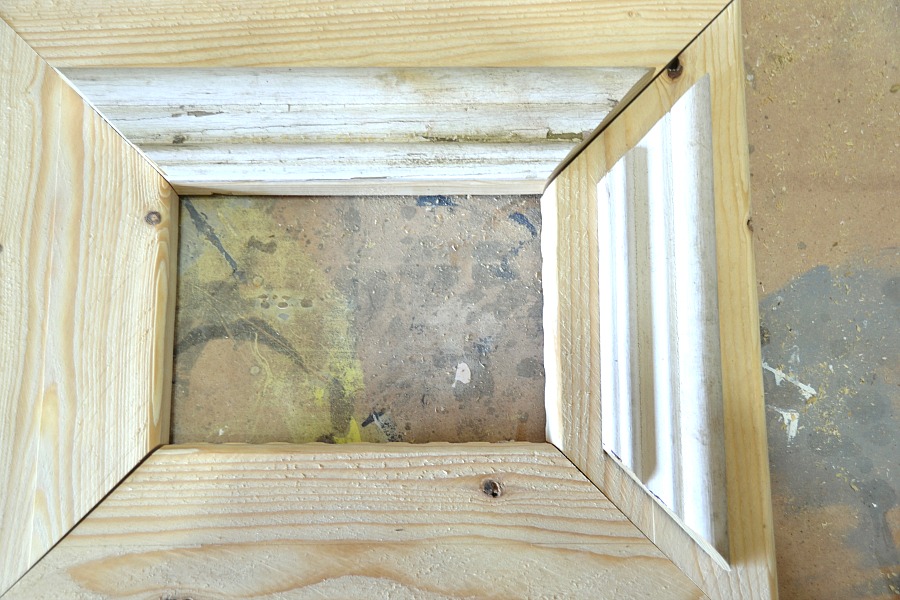
If this were a 1×2 board, I probably could have stopped here, but 1×4’s have a lot of surface space, and Rita’s photo showed a frame with a bit more detail to it.
Fortunately for me, my neighbour was throwing away some old trim, so I snatched it up and repeated my steps with the trim pieces.
NOTE: trim work is not as easy because the bumps and grooves need to line up. After a few mistakes (thank goodness the wood was free), I managed to cut 4 pieces individually (not in two’s as above) to fit together nicely. It’s more a matter of cutting one, then tracing it onto the next piece.
Relatively nicely anyways.
Nothing a little wood filler can’t clean up for me.
I used an industrial stapler and stapled along the back seams of the 1×4 boards (after gluing with wood glue). I added wood glue to the back of the trim pieces and nailed them into place with finishing nails.
Overnight in the clamps and my frame is sturdy as can be.

After a thorough sanding to get rid of the wood filler and any imperfect edges (150 grit, 220 grit) I added three coats of paint.
I need more practice with the second technique, but for a rustic / farmhouse look, this will fit the bill.

Tap some sawtooth hangers into the back of your wood frames and you’re ready to go!
How to make wood frames:

Supplies:
Wanna see the finished gallery wall?
Come back tomorrow for the reveal!
Have a great one!

2 Responses