A $10 table can look like a million bucks with just a bit of elbow grease and a hint of confidence.
Hellooooo my friends!
I have been chugging away in the background building a board and batten wall in my dining room, refinishing an old oak school chair, building a cabinet for my daughter’s guinea pigs and refinishing some bookcases that are going to be SPECTACULAR. I’ve also been planning and plotting the rest of my dining room makeover, including refinishing my floors myself and adding a built-in bar area to a section of wall that has 3 angles to it.
I’m having FUN!
Busy, but fun.
I’ll share all of those projects with you in the next while, but for today I wanted to show you a $10 side table I found on Kijiji:
I LOVE it!!
Well, not in its current state, but I love round tables with pedestal bases. Probably because it’s something I’m not sure I can make myself (yet 😉).
Someone had already taken a shot at refinishing it – this is a blue chalk paint (I REALLY don’t like chalk paint) – but it does mean an easy refinish job for me.
I’m going to put my “Refinishing a side table” video here so you can see how easily the chalk paint sanded off. I have tried a couple of brands in the past and it just isn’t my thing.
I’m not big on “rustic” or “antiqued” furniture, particularly after I put so much work into making them look new. Chalk paint scuffs so easily that it would break my heart to have a table that was formerly ratty – but had been refinished – look ratty again.
Just me. 🤷🏻♀️
Under the chalk paint was a black MDF table with an oak veneer on the top. I LOVE that!
I sanded through parts of the veneer so I attempted to re-veneer the table.
I’m not even going to show you photos of that – I did a TERRIBLE job.
I was too excited about refinishing a side table that I didn’t follow the gluing instructions properly and the veneer bubbled up everywhere.
Plain old embarrassing.
Which meant I had to move on to Plan B – which I’ve always wanted to try, but have been too nervous to – cutting a circle round with a router!
I don’t like my router one single bit. It frightens me and my previous (limited) experiences with it have lead to gouges and penis marks in my furniture:
I could have said “vine” marks, but there is one in particular – that is still in my coffee table – that has a very distinct “look” – you see it, I know you do. If you come over for tea, pretend you don’t notice okay?
This was the result of not following instructions…. I’m noticing a theme here? 🤨
This time I followed DIY Montreal’s tutorial for how to cut a circle and (of course) it worked!! You can see the process and my Happy Dance jubilation in the video.
I’M SO AWESOME!!
I really was through the roof with this one. It’s a small thing, but every accomplishment gives you more confidence – now all I want to do is cut circles. 😂
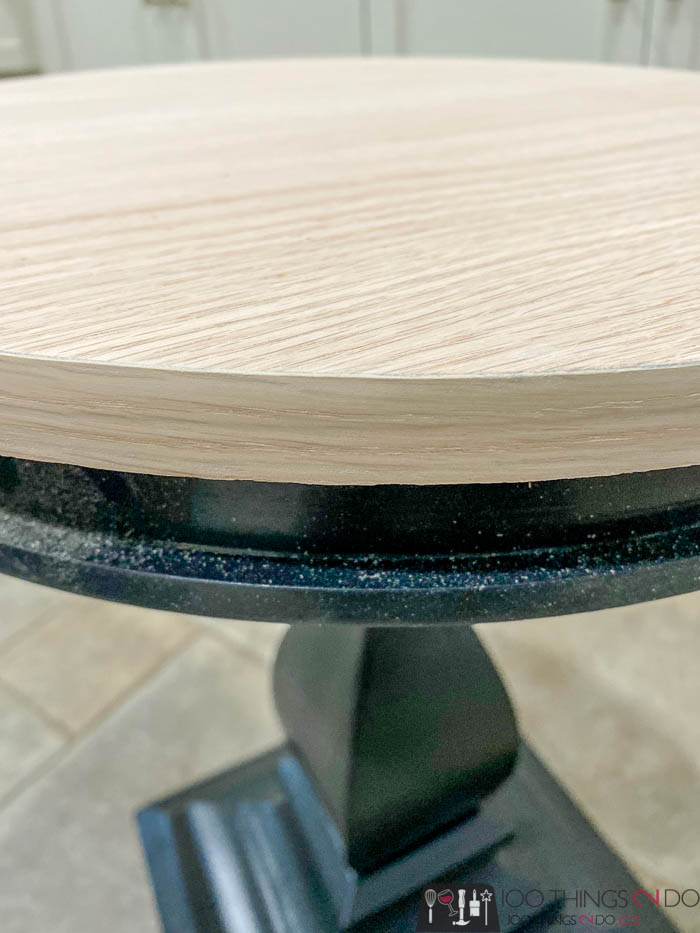
Because this is ¾” oak plywood, I did still have to apply edge banding to the sides of the small table top to hide the layers. That was just a matter of ironing a thin pre-glued strip around the edges and trimming off the excess with a utility knife.
The next step in refinishing a side table (if you are painting it) is to prime it. If you don’t want your finish to sand off easily a coat of primer is imperative to keep your surface paint adhered. Did I say that correctly?
A coat of primer, with a very light sanding once dry, and then you are ready to paint.
My go-to paint for furniture is Benjamin Moore’s Advance formula. It’s pricey, but it’s as close to an oil-based finish as you can get – without the mess of dealing with an oil paint. It’s a latex paint (read: water-based) so it cleans up easily, has no harsh fumes and hardens as it cures making it the best choice for furniture and cabinets. (at least in my humble opinion)
After two coats of paint the pedestal section was finished.
I used Rust-Oleum’s aged wood accelerator for the finish on the top sections and then sealed it with Varathane Triple-Thick (my favourite finish).
The previous table top was glued and screwed to the pedestal base, so instead of battling to remove it, I simply cut a larger top and then screwed in in place over the old one.
Other than the fact that I attached the top crooked to the square base – which I only just notice in these photos and will go outside and fix this minute – this small side table makeover turned out perfectly!
Right size, right height, beautiful two-tone finish and it tucks in between my two arm chairs like it was meant to be.
Now that I’ve got cutting a circle with a router down, I’m really going to have to think about learning to build pedestal bases.
After I learn how to refinish hardwood floors, and build built-ins for the dining room and learn to use an angle grinder to create wave art…
I’m hoping you’ll see many, MANY more (ridiculous) happy dances as I take on the world. 😂
Refinishing a side table
Have a great one!


