Good morning friends!
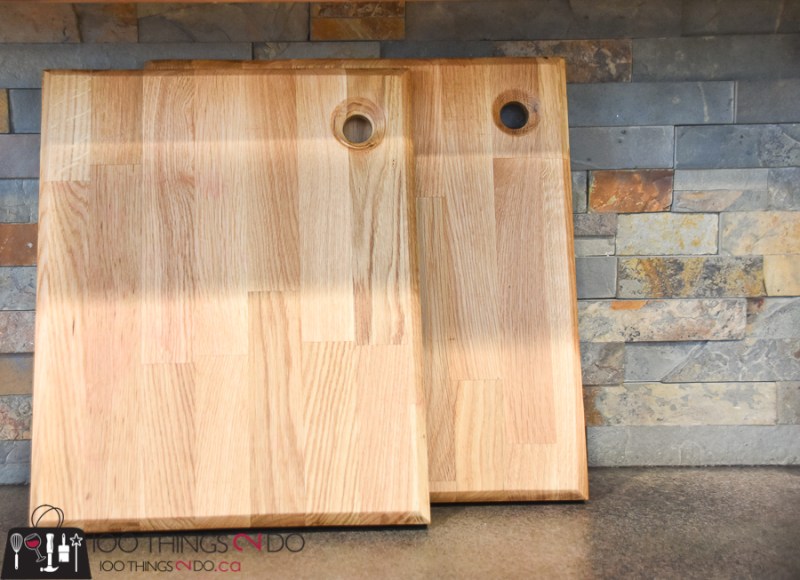
I’m sorry for being AWOL as of late – our family took a belated vacation, which I’ll share more about in another post – but for today I want to show you a project I’m quite pleased with: my new cutting board!
A friend (thank you Sherri) gave me an off-cut of an Ikea Hammarp countertop that was leftover from a kitchen remodel she’d done.
It’s made from oak and has sat in my garage for MONTHS – I just didn’t get around to doing anything with it.
Until this week.
The counter was a large piece – too big for a cutting board or serving tray, but too small to be a tabletop, so I decided to cut it down to more manageable pieces.
I didn’t want just a plain slab of wood for my cutting board, so I drilled a hole in the top corner so I could easily slide it in and out off of a shelf or cupboard.
This still didn’t seem like enough ‘oomph’ so, ladies and gentlemen, I used a ROUTER for the first time EVER!
Hubby’s had one in the basement for longer than I’ve had this blog, but I hadn’t taken the leap to learn how to use it. Now that I have, you may be seeing routered edges on everything I make going forward!
For my cutting board I went with a champfer bit (45° angle) set to about half the depth of the wood.
The black marks you see are where I held it in place too long, or bumped an edge instead of a smooth glide.
First time remember.
I thought the handle hole was a little small (and I was having fun with the router) so I decided to give it a little edging as well.
I sanded out the black marks and made sure everything was perfectly smooth going from 120 grit sandpaper, 220, then to 320 grit to finish.
I cleaned the cutting board off to remove any sanding dust and then coated it with cutting board oil and let it soak in overnight. (video on Instagram)
The next day, I gave the boards a nice coating of cutting board wax and they are done!
Oak is a hard wood, so be warned that while it’s a great surface to cut on, it will probably dull your knives over time.
I’m loving that champfered edge!
I also love the look of layered cutting boards, so having two makes a pretty display when not in use and allows two cooks to work simultaneously without cross-contamination between foods.
This makeover took 30 minutes (not including the time it took me to set up the router and watch 3 videos on how to use it) – so it’s a great “whip out in no time” project.
Also a great gift idea for just about anyone on your Christmas list!
I’ll share more about our vacay in another blog post – I can’t wait to tell you what I learned!
Have a great one – and stay warm!


