If you have more than one belt, then you need this simple belt rack in your life. One piece of wood and a coping saw are all you need.
I have the best post in the world today!
Well, the cure for cancer or the solution to world hunger would be better – but I’m pretty stoked about this super-simple idea and even happier about how well it works!!
I broke my belt hanger about a month ago; it was a plastic circle with hooks coming out of it and it hung on the closet bar like a regular coat hanger. I’d had it for years and it did a good job – but it finally gave way to the size and girth of my belt collection. (Girth referring to the waist square footage that they needed to cover. lol)
So I started searching for DIY belt racks on Pinterest – the first and foremost source of inspiration in my humble opinion and I came across a version that was nothing more than a length of wood with slots cut into it. The creator had added a coat hanger hook afterwards so that it could be hung on the clothing rod, but I knew that (for me) it made much more sense to save the hanging space and create a version that could be tucked just inside my closet door – or on the door itself really.
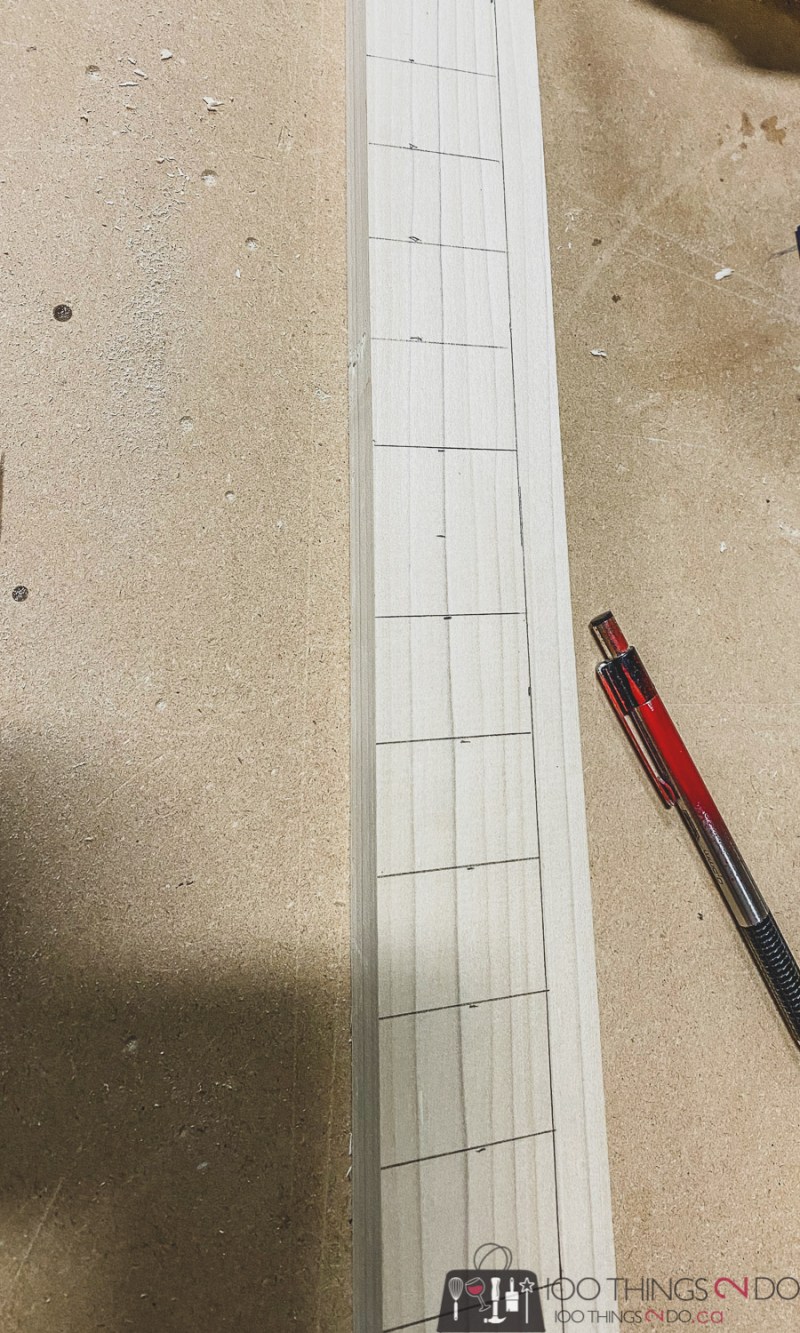
I started with a 2 ¾” by 15″ piece of poplar at ¾” thick.
I drew a line ¾” in along the entire length of the wood – this is the section of wood I did NOT want to cut into.
Then I drew perpendicular lines at approximately 2″ apart on the length of the wood that I was going to cut into.
I measured my belt and it came in at roughly 3/16″ thick, so I decided that two cuts on the table saw (assuming a 1/8″ blade thickness) would give me enough space to hang my belts.
I set up the table saw so that the blade was 2″ at it’s highest point and then used the cross-cut sled to hold my piece of wood in place as I cut each notch.
I should say, “as I cut each notch twice so that it was ¼” wide”.
It was more of an approximation that a particularly accurate cut as you can see below. lol. Some are slightly wider, but in my defence it was my first time using a cross-cut sled, so there was a bit of a learning curve.
Don’t think you need a table saw to make this either! A hand-held coping saw would make this simple belt rack almost as easily.
That’s it guys – you just made a super-simple belt rack!
Okay, okay – I did do a bit of sanding to make it slightly prettier, and I drilled two holes so that I could screw it to the wall when I was ready to hang it.
The centre section is slightly wider than the others because I was on the fence as to whether I’d try to add the hook section of a coat hanger so that this could reside right on the clothing bar – but…
look how little space it takes up on the wall!!
It’s not a whole lot thicker than the door mouldings, so I just used a couple of drywall anchors – again, “girthy” belts – and hung it just inside the door.
I generally wear men’s belts because they have the strength to keep my pants up and butt-crack covered over women’s pretty and delicate belts – but this super-simple belt rack will work for either. It’s essentially the overlap of the leather and/or the buckle that is keeping the belt from falling, so you can go narrower or wider with your belts and be fine. Only thing it might not hold (unless you cut larger slots) are chain belts…. are they even in anymore?
Drop your belt into a slot and done! No futzing or putzing!
I am so happy about this build! Form, function, easy and inexpensive to build and it takes up almost 0 closet real estate!!
Saving starving children would have made me happier than this “how to make a super-simple belt rack” article – but that is a battle I’ll tackle in smaller bites. (forgive the pun)
This would totally work for ties as well – just in case belt storage isn’t a primary Christmas wish list item.
So you could head over to your favourite family member that has a saw, or pick up an inexpensive coping saw at your local hardware store and whip out dozens of these super-simple belt racks!
I love this so much! lol
Have a great one!


