Week 5 progress of the Fall 2018 One Room Challenge and we are almost to reveal day!
The bi-annual One Room Challenge (with media partner Better Homes and Gardens) is in Week 5 (of 6) and the checklist is going down!
The ORC is a challenge to completely makeover one room in 6 weeks. We’re talking flooring, lighting, plumbing (if applicable) and of course paint – all to be documented on our blogs over a 6 week period, with the final reveal of the completed room scheduled for November 7th.
There are no prizes for this challenge (unless you make a whopping impression on Better Homes & Gardens). It’s about inspiring others to take on a challenge in their own homes by showing how easy (or difficult) it is. You’ll see room transformations week-by-week by visiting the ORC Guest Participants link page.
To remind you what our goals are for this basement home office, this is the mood board we are working towards:
and this is the checklist of items on our to-do list:
Rustic industrial basement office
pack up roomdemo cabinetspatch drywallpaint wallsstrip flooringinstall faux brick wall- sand, prime and paint doors and trim
install new baseboard- install recessed lighting
lay new flooringzinc finish on filing cabinetstrip door for desk and stain- build pipe shelving
- stain shelf boards
build pipe desk- order plexi-glass for desk top
- office seating
- staging/styling
install new casing- source furniture
office artwork
I need to apologize for missing the week 4 ORC blog post, but I was away at a blogging conference and our progress was halted due to other (work) commitments. That’s not to say we didn’t get any work done for the challenge, just that I didn’t have time to blog an article about it.
I did however post an article on how to create a faux-zinc finish on Sherri‘s filing cabinet:
Here’s the before and after in case you missed it:
While I was putzing with the filing cabinet, Sherri finished installing the flooring and got the brick paneling hung on the accent wall.
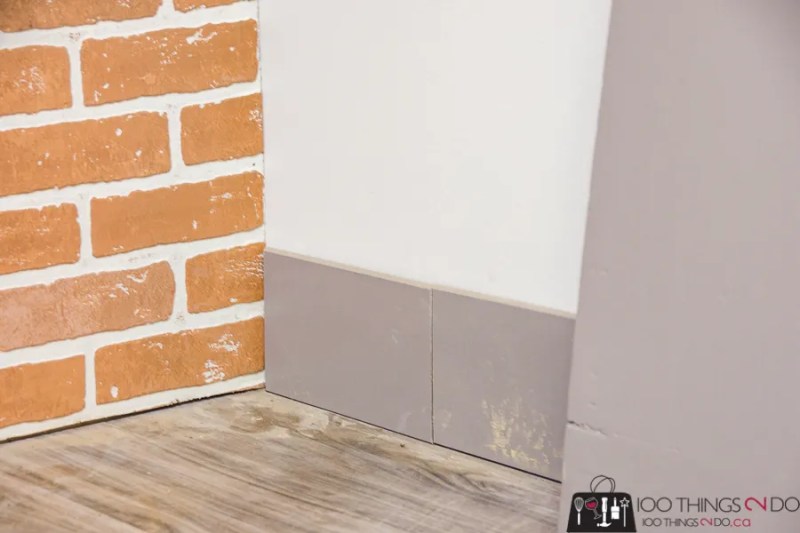
I got a lesson in cutting and installing baseboard – including making scarf joints:
I won’t say I did it spectacularly well, but Sherri assured me it’s nothing a little caulking can’t cover up.
We also installed the casing around the doors.
Sherri handled cutting out the vent and socket holes in the paneling:
and I handled picking up an item or two from HomeSense.
More priming and painting for the trim work and doors, pipe shelves to be built and boards to be stained and finished, updating the lighting and then style and stage.
We might just make it!
Come back next week – you really won’t want to miss the gorgeous finale to our basement office makeover.
Rustic industrial office makeover – One Room Challenge, Fall 2018
- Week 1 – Before photos and storyboard
- Week 2 – Demo, purging and emptying progress, paint
- Week 3 – Special project: Business logo sign!
- Week 3 – Door desk, paint and flooring
- Week 4 – Faux zinc filing cabinet
- Week 5 – Accent wall, baseboard, trim
- Week 6 – ROOM REVEAL!
Be sure to check out the ORC Guest Participant page for more awesome makeovers!
Have a great one!


Ooooh, love where you are going with this!!! Can’t wait to see it finished.
Very nice! Can you explain what you did to the faux brick wall?
Sherri coated it with the joint compound that you use to mud drywall. She spread it on with a putty knife and then quickly scraped most of it off. Don’t worry too much if you apply too much – it’s easily wiped off with a damp cloth and even when it’s dry you can brush it lightly with sandpaper to get any excess off.
Thank you! I love the look and that sounds easy.