I’m so excited about today’s patio coffee table build! I’ve been dying to try making a round table, but all of the videos I’d seen online showed people cutting them with plunge routers. If you saw my #scrapwoodchallenge can crusher the other day, then you know that my expertise with a router is non-existent.
BUT
The other night we had friends over for backyard barbecue and the cedar patio table I made a couple of years ago – while perfectly functional and great for keeping dog noses away from food – was also a bit of a visual barrier when having a conversation. I can’t explain it exactly, but the height and the colour were just too heavy for the casual atmosphere.
I finally had an excuse to try making a round patio coffee table and I couldn’t wait to get started!
I should premise this with “this is made entirely from scrap wood”. It’s not a scrap wood project, you’ll need a few longer pieces, but I wasn’t sure I could do it, so I just used what I had on-hand which included pine and cedar as you’ll see in the photos.
Patio Coffee Table
Wood:
*Note: wood is in nominal measurements, which means it should be cut to the sizes I list. The nominal measurement of a 2×4 is actually 1 ½” by 3 ½”)
- (4) 1 ½” by 3″ boards cut to 17″ long (20° mitre on either end, running parallel to each other)
- (1) 1 ½” by 1 ½” board cut to 26 1/8″ (20° mitre on either end, running perpendicular to each other)
- (1) 1 ½” by 3″ board cut to 21 1/8″ (20° mitre on either end, running perpendicular)
- (2) 1 ½” by 1 ½” boards cut to 12 3/16″ (90° on one end, 20° mitre on other)
- (2) 1 ½” by 3″ boards cut to 10″ (90° on one end, 20° mitre on other)
- (4) ¾” by 5 ½” boards cut to 33 1/2″ long
- (11) ¾” by 1 ½” slats cut to 20″ long
Tools & Supplies:
- table saw
- mitre saw
- jig saw
- sander (and sandpaper)
- pocket hole jig
- wood glue
- 2 ½” pocket hole screws
- 3″ deck/construction screws
- 1 ¼” pocket screws
- 1 ¾” deck screws
I started my DIY patio coffee table with the top – you don’t have to – I just wanted to make sure I could cut a decent enough circle before I took the project further.
I use four 1″ x 6″ (nominal size: ¾” by 5 ½“) boards and butt them up against each other into a square. I was trying to create an interesting pattern by overlapping the boards this way. It doesn’t show as well on this build, but you’ll really notice it on the side table (plans coming soon). I pre-drilled pocket holes, but only attached the boards (temporarily) at the holes nearest the centre. (You DON’T need to drill 3 holes in each board like I did – see below)
I centred my top frame on my workbench and then tapped a nail into the centre point. I used some duct tape, folded back on itself, to draw my circle. Put one end over the nail and then cut a small hole in the tape where the edge of your board is and put the point of a pen through that hole. The tape doesn’t stretch or wrap like string does, so I found this a much better way to get a perfect circle.
Once your circle is drawn you’ll see how two of the three pocket holes I’d drilled for my table are actually in the areas that will be cut off to make the circle. One mistake for me, one less for you to make. Unscrew your boards and use wood glue and 1 ¼” pocket screws to attach your boards tightly together.
I cut my circle out with a jigsaw and while it wasn’t absolutely perfect, it’s nothing that can’t be fixed with a little sanding.
For the centre of the patio coffee table I decided I wanted slats – this will keep water from pooling on the table and rotting the wood any faster than necessary.
I cut 1 ½” strips at 20″ long from 1″ wood – basically a 1″x2″, but remember I was using scrap and the nominal measurement of a 1×2 is ¾” by 1 ½”
I pre-drilled a pocket hole in each end of the strips and then used wood glue and 1 ¼” pocket screws to attach them in place.
I started attaching the slats with the centre one, then split the difference and centred another one on either side of centre. Or you could do it however you like. You DO want to have one slat in the centre though because it will hide the base frame of the patio coffee table. I used the very specific and accurate measurement of “about a pointer finger” of space between each board.
Once the glue is dry, sand it smooth (and round) with 60, 120 and 220 grit sandpaper. Ignore the shit-show that is the bottom, the top is pretty bang-on.
Now for the base of your DIY patio coffee table;
I wrestled with angles for a good hour or two before I called in the cavalry (my Step-Dad) to tell me what angle I needed to cut. My calculations had me cutting an 83° angle – how on earth can one cut an 83° without a jig and/or losing a finger or two!?
My brilliant Step-Dad came up with a solution that had every angle in this base cut at 20°! Whew! Something my mitre saw can cut easily and accurately. Cut your 17″ boards with a 20 angle on either end – these angles will run parallel to each other.
Cut your 26″ and 21″ boards with 20° on either end, but this time the angles will run perpendicular to each other. See image.

Drill pocket holes in either end of your 26″ board, I did one on either side. Use wood glue and 2 ½” pocket screws to attach that board to the 17″ legs on either side.
[fusion_builder_container hundred_percent=”yes” overflow=”visible”][fusion_builder_row][fusion_builder_column type=”1_1″ background_position=”left top” background_color=”” border_size=”” border_color=”” border_style=”solid” spacing=”yes” background_image=”” background_repeat=”no-repeat” padding=”” margin_top=”0px” margin_bottom=”0px” class=”” id=”” animation_type=”” animation_speed=”0.3″ animation_direction=”left” hide_on_mobile=”no” center_content=”no” min_height=”none”]
Line your table bottom up with either side leg and pre-drill a hole up through the bottom. We’re trying to keep the number of screws visible to a minimum. Attach the bottom to the table legs with wood glue and 3″ deck/construction screws.
To build the rest of the DIY patio coffee table frame you’ll need to pre-drill pocket holes in the 12″ boards – both ends and on both sides. These will be attached to the centre frame using 2 ½” pocket screws and wood glue and to the 17″ leg board.
Your 6″ board will need a pocket hole to attach it to the centre frame, but will attach to the leg in the same way we did before – with a 3″ deck screw drilled up from the bottom.
In hindsight, I really should have drilled the pocket hole on the bottom of the base board and not into the side – again, this would have made the piece much cleaner looking. Mistake 2 for me – 2 less for you.
Hopefully your base will look similar (but better) than this:
To make my/your life easier, this would be a good time to sand the base down. 60 then 120 grit sandpaper to get everything smooth and even and looking good.
With your patio coffee table top upside down, place the base upside down on it and centre.
I pre-drilled holes near the leg junction and attached the base to the table top with 1 ¾” deck screws. I used 4, which is plenty strong, but you could add more – just be careful not to over-drill or the screws will poke through the table top (Mistake 3).
If you have any gaps or blemishes – cedar is a VERY soft wood) now’s a great time to use a bit of wood filler to clean things up. Once that’s dry, use 220 grit sandpaper to give your table a beautiful polish.
If you made your table entirely out of cedar – you’re done! It will patina beautifully over time and will also help deter bugs (mosquitos hate cedar). Because my DIY patio coffee table is a mish-mash of pine and cedar, I do have to take the extra step of staining it.
My sweetie-pie Leisa at Clancy’s Rainbow came up with a custom stain for me that would compliment my existing patio furniture. I have projects I’ve coated in Arborcoat over the online casinos at gamset years and I can honestly say that the durability is outstanding.
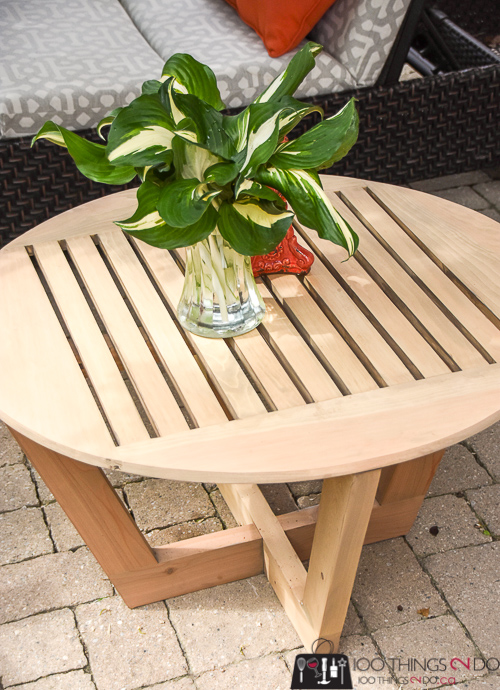
My first ROUND patio coffee table! My first round table at all!
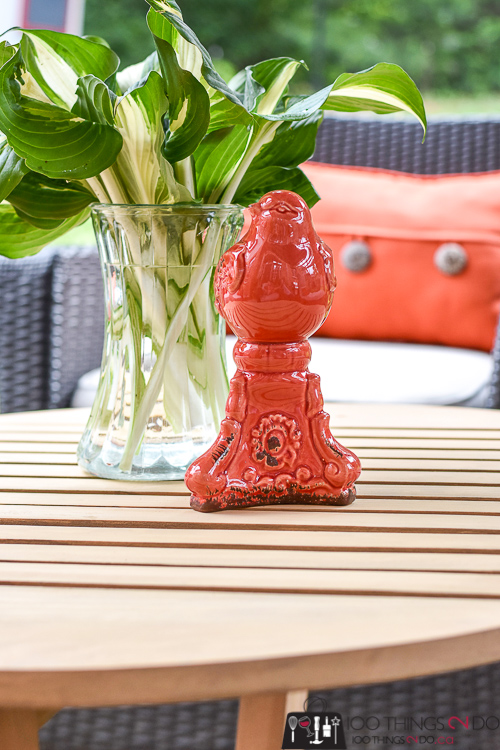
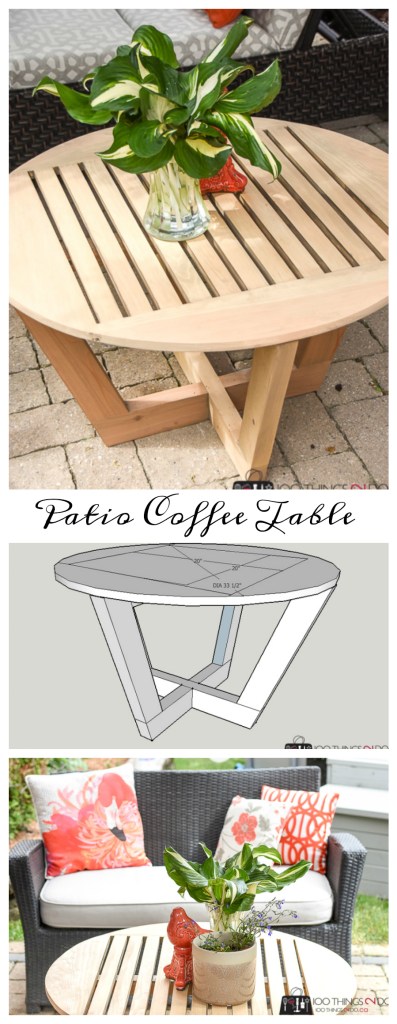
 It’s kinda perfect though don’t you think? The diameter is 33 ½” and it’s 20″ high – just right for resting a glass of wine, putting your feet up and keeping the conversational feel open and airy!
WAIT till you see the matching side table!!!
Pin it for later:
Have a great one!
Linked to:
[/fusion_builder_column][/fusion_builder_row][/fusion_builder_container]


2 Responses