At least that’s what I think these star lanterns are called?
(this post contains affiliate links, for full disclosure see sidebar)
You’ve seen them, they are usually made of white paper with a light inside and are hung in the windows over Christmas. I’ve seen them called Scandinavian stars and Swedish stars and I LOVE them.
So I decided to make myself one.
But paper is so “been there, done that” whereas metal Scandinavian stars is so “WOWZA, I have to try that!”
So I did;
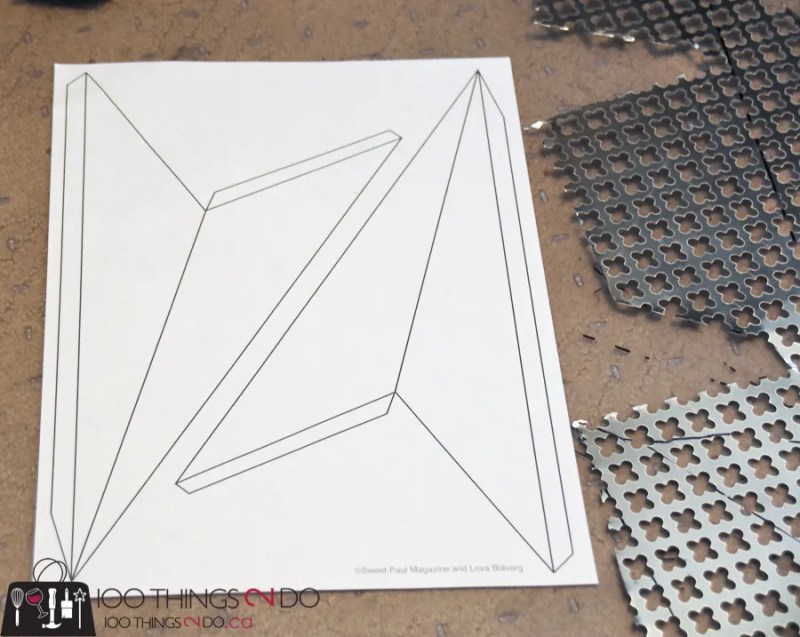
I found a pattern for the stars over on Sweet Paul magazine, so I printed it off to use as my template.
I cut out my paper pattern and then traced the triangles onto my patterned aluminum sheets with a Sharpie marker.
One sheet at 2′ by 3′ gives you enough metal to make a 7-point, or 8-point Scandinavian star. Use tin snips and GLOVES when cutting (yes, that is blood on my paper template).
Once you have all of your metal cut, 14 triangles worth, place the paper template back underneath the metal and line up a sold edge with the fold markings on your template.
This is where it gets really bloody, so PLEASE wear GLOVES! (the ones I had were too small for my hands)
Use another straight edge underneath the paper template to bend the metal up to a 90° angle:
Repeat on the other fold line, and then repeat on each of the 14 triangles you’ve cut for your Scandinavian star.
I used a bit of floral wire here and there to hold each pair of triangles together to create the tines for my star (don’t worry, these are almost invisible when you’re done). Twist them tightly to hold the metal sections together and clip off any excess.
Once you have all of your points put together, it’s time to attach them together to make your Scandinavian star shape. I used floral wire on the front and the back of my star to make sure everything was solidly in place.
If you decide to leave your star as a shiny silver (or whatever colour metal you’ve chosen to work with) you can insert tiny, battery-operated twinkle lights before attaching the last point to the overall star.
I wanted a gold star, so I had to make the entire star before spray-painting it gold.
I then undid the floral wire on one of the points and inserted my twinkle lights after the fact.
Isn’t it GORGEOUS?!
A little blood shed, but so totally worth it!
The Sweet Paul Scandinavian star template makes a star that is about 18″ tall – so this is a substantial piece of Holiday decor.
My girls asked if we could use it as our tree-topper, but because this Scandinavian star is battery-operated, it would mean I would have to scale the tree to light it and turn it off each day.
Instead I decided to hang it in a window, as Scandinavian stars are supposed to be, to enjoy each day in it’s gold glory and each evening with it’s patterned glow.
Once my body has regenerated the pint of blood lost on this first attempt, I just might try to make more to eventually have stars hanging in all of our windows.
Note: I was provided with aluminum sheeting from M-D Building Products for my “How to make a lamp” post. Pieces used in this project were leftovers, and not a second sponsored post.
Have a great one!
Linked to:


Absolutely beautiful. Love it.