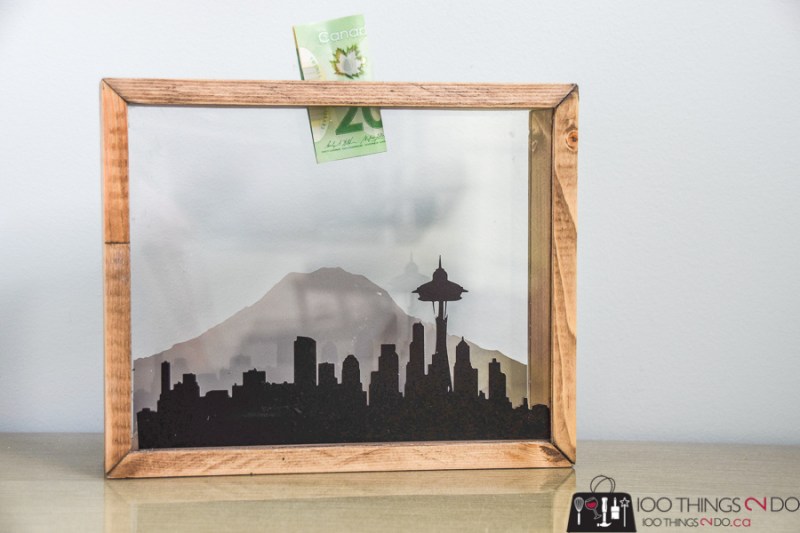
Who says Piggy Banks are only for kids? I’d say, as adults, there are far more items on our wish lists that are just a skinch out of reach than there ever were when we were kids. Make your own scrap wood coin bank and get a little closer to your dream with every dollar.
I’ve got an easy project for you today. One that you can whip out in an hour – but it does take a bit of confidence with the table saw. This is my scrap wood coin bank, and you’ll never guess what I’m saving for?
Scrap wood coin bank
- (2) pieces 1″x2″ cut to 9 ½” long
- (2) pieces 1″x2: cut to 7 ½” long
- (2) pieces plexiglass 8 ¾” by 7″
Before cutting your 1″ x2″ boards, set up your table saw so that the fence is at roughly ¼”.
Raise up your table saw blade so that it is approximately 1/8″ high.
Run your 1×2 board over the blade and against the fence to create a groove on one side of your board.
Turn your board around and repeat creating a second groove.
Cut your 1×2 down to the lengths listed above with ta 45° angle on either end – not perpendicular. The long sides of your boards will still measure at 9 ½” and 7 ½”.
Give the grooved face of your boards a good sanding and apply paint or stain – you won’t be able to paint/stain once the plexiglass pieces are in place, so you should do it before you assemble your scrap wood coin bank.
While those are drying, measure and mark the centre of what will be the top of your coin bank.
Drill a hole ¾” from either side of that centre point. Use a jigsaw or a scroll saw and cut so that the two holes are connected and make up a coin slot.
Clean both sides of your plexiglass, then run a small river of clear glue (I used Gorilla clear) into the grooves on one side.
Slide your plexiglass into place. Repeat with the remaining three sides.
You can clamp your DIY coin bank until dry, or use 1″ brad nails to hold everything in place.
I didn’t have the patience to wait for the glue to dry so I went with brad nails. (You can see why you need to clean the plexi BEFORE assembly).
Finish staining or painting the outside.
You’re done!
Unless you want extra motivation to actually use your scrap wood coin bank…
like maybe an image or a quote for example?
I used my Silhouette machine to cut a mountain shape out of grey adhesive vinyl, and the Seattle skyline out of black.
Yes, I’ve been dying to see the west coast for years now, but something always comes up to make it a pipe-dream.
From my side of Canada (Ontario) its pretty expensive to go that far, so it will probably take several of these coin banks to stash enough money away – but hey, everyone’s got to start somewhere right?
I tucked in a $20 and some pocket change and I am now $22.15 closer to Seattle than I was this morning.
Just about the cost of a phone call to book a hotel I’d guess? lol
Change out the image to a couch or a camera or add text to read “College Fund” or “Rainy Day”.
Or, what Chloë wanted to do, put in some sand and create an ant farm (but be sure to block the coin hole somehow!) lol
It’s cute, it’s decorative, it’s functional and it’s easy – what more could you ask for?
Except maybe a trip to Seattle…
Have a great one!
Linked to:


One Response