Sure you can buy tiered plant stands for $100 and up, but why buy a flimsy version when you can custom make one to your height and specs? These easy build instructions will have you whipping a tiered plant stand out in an afternoon!
Are you tired of plant stands yet?
I apologize for two in a row, but it’s SPRING! If you aren’t thinking of planting and bringing some life to your yard now, then when?!
This was the plant stand I wanted to build for my daughter, but she requested the ladder plant stand for her room instead.
Not to be deterred, I decided that I still needed to make this tiered version that I’d seen on Wayfair to decorate my front porch and/or between my patio seating.
These run around $110 CDN at Walmart to over $150 CDN on Wayfair….
but I knew I could do better than that!
I knew I wanted a two-tiered plant stand (bottom and top shelves only) and I wanted it to be about 36″ (91cm) tall. I wanted the bottom shelf to be able to hold a 12″ (30cm) planter pot and the top shelf to hold an 8″ (20cm) pot.
From there I made a prototype to find out the best way to make my little cutie.
When I decided my prototype was $%it, I came up with a better and more streamlined plant to make this tiered plant stand.
Hey, live and learn right?
Cut list:
(4) 1″ x 1″ x 38″ legs. (2.5cm x 2.5cm x 96.5cm)
(16) ¾” x ¾” x 12″ bottom shelf. (1.9cm x 1.9cm x 30.4cm)
(11) ¾” x ¾” x 8″ top shelf. (1.9cm x 1.9cm x 20.3cm)
You will need:
- table saw
- compound mitre saw
- drill
- ¼” (0.63cm) wood dowels
- ¼” (0.63cm) drill bit
- 1 ¼” (3.2cm) finishing nails
- outdoor appropriate wood glue
- outdoor stain/sealer
- flush cut saw
- Optional: brad nailer
- Optional: sand paper
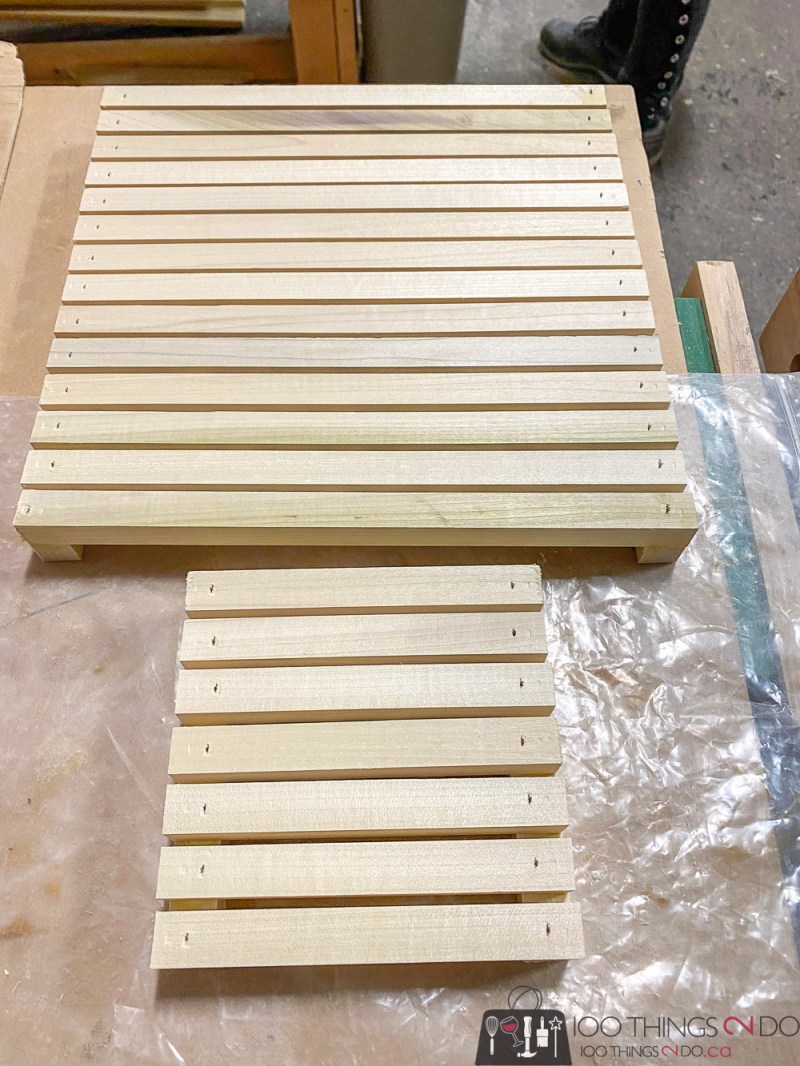
Start by laying out two 12″ (30.4cm) bottom shelf pieces, then lay the remainder of the 12″ (30.4cm) pieces on top, perpendicular to the bottom braces.
Repeat this with the 8″ (20.3cm) pieces; two pieces to act as braces and the remainder spaced equally apart to create the shelf itself.
I eyeballed the spacing of the slats, but I believe they came out to roughly 3/16ths apart. Use some outdoor-appropriate wood glue and then tack the slats in place with 1 ¼” (3cm) finishing nails. (The above photo shows a 12″ shelf and a 6″ shelf per my prototype – I found that an 8″ shelf is much more usable)
Next you’ll cut a compound mitre cut on one end of the legs of your tiered plant stand. To do this, set your mitre at ~3.5° AND your bevel at 3.5°. You can’t cut each angle separately – it must be a compound cut with both the mitre and bevel at the same time. This will give you legs that angle in on three sides. Mark the corner that has the longest side with a pencil.
Mark a line on each of your legs at the 6″ (15.2cm) mark (from the longest side), then mark a second line ¾” ( 1.9cm) below that. Draw an X to mark the centre of that small square. You can repeat this on the adjoining (long) side so that you can decide where you will drill in a later step. Repeat on all four legs.
We’re going to repeat this process at the 36″ (91.4cm) mark on each leg; mark the 36″ height on the long sides of the legs, then mark ¾” (1.9cm) below that.
Your 36″ (91.4cm) mark will be below the top of your legs – I cut mine short prematurely – but you want the excess so you can flush cut it off at a later step.
Once you have your long sides marked, set your shelves against them to determine where you would like your dowels (joinery) placed. You’ll notice that two long sides will face to the left and two to the right. This isn’t a difficult step, but with the minute differences in angles on the base of each leg it’s easy to get them mixed up. (That’s why we marked the long sides with pencil)
Using ¼” (0.63cm) drill bit, drill holes through the centre marks on ONE SIDE of each leg. Yes, we’ve marked two sides, but this was to give you options once you had your tiered plant stand laid out.
Next, mark with an X, the centres of your shelf braces – the end grain ends. Repeat on all four end grains on each shelf.
Using the ¼” drill bit, drill into the end grain brace about ¼”- ½”.
Thread your ¼” (0.63cm) thick dowel through the hole in the leg and into the hole in the end grain of the braces. The legs will wobble and fall around while you’re doing this, so an extra set of hands might make it easier.
Once you have the legs set in place with the dowels dry fit into the shelf braces you can either add a second dowel to your top shelf, or (later) pin it in place with 1 ¼” (3.2cm) finishing nails. I opted for the second dowel because I liked the look.
After attempting your dry fit – take your tiered plant stand apart, add outdoor appropriate wood glue to the holes and dowels and put it back together again. Clamp until dry or use finishing nails to hold in place.
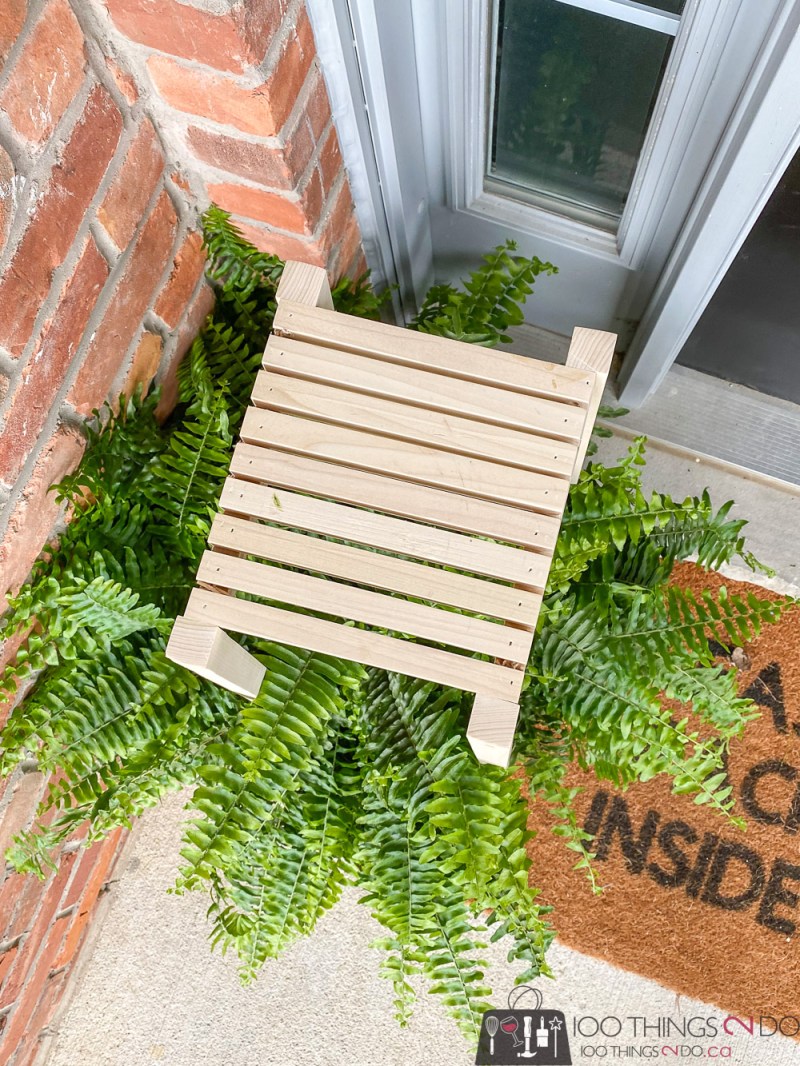
Use a flush cut saw to cut off the extra length of each leg. Line your saw blade up so that it is flush with the top shelf and cut carefully so you don’t scratch up the shelf itself.
The above photo shows my legs attached to the sides of the shelf braces. After my initial prototype I decided that hiding the end grains was more aesthetically pleasing.
Below you can see my prototype on the right and the version you are building on the left.
That’s it!
A bunch of scrap wood milled down to 1″ (2.5cm) square dowels and ¾” (1.9cm) square dowels, a few ¼” (0.63cm) round dowels and some wood glue and you are done!
I take that back… you’ll want to seal this if you use any wood other than cedar or pressure treated. My tiered plant stand is made from poplar so I’ll be adding an outdoor appropriate clear coat to protect it from the weather and draining plants.
If I were to calculate the cost of this – based on poplar and the number of board feet needed – my build would come in around $20 CDN without labour and finish. If you have scrap wood already in your garage, you can whip this out for free!
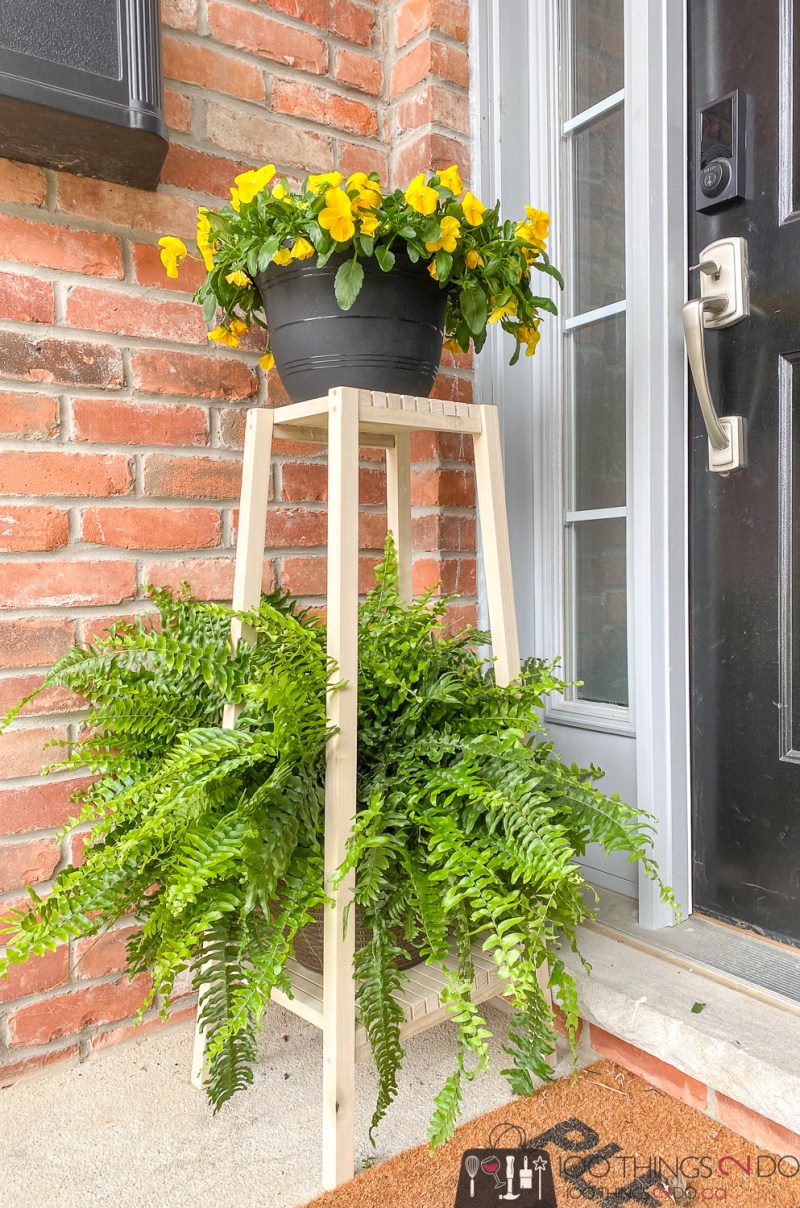
The top shelf of your tiered plant stand will hold up to 10″ (25.4cm) pots and the bottom shelf is holding a 12″ (30.5cm) pot (I did have to wiggle it in a bit though because the fern was so full).
I love the height and interest it adds to my front door:
What I actually wanted the tiered plant stand for, was to set it between my patio chairs to add a little green and height:
If you made 4, you could use them to section off your patio like a little room.
Hmmm….. now I might need to make more….
Use it indoors or out – keep your plant babies on display year round!
Make it as a gift for Mother’s Day!
Or make a couple for yourself to celebrate the arrival of Spring!
Have a great one!


