A $30 find, patched, painted and finished with a bead board backing, turned into this black bookcase stunner!
Thursday I showed off the black desk makeover and gave a little sneak peek at the bookcase I refinished to make an office combo.
I won’t go through every single step again, if you want to know how I refinish furniture you can read the desk post or the “How to refinish furniture” post I put up a couple of years ago.
Today I’m going to share a long-winded explanation of how I got to the desk-bookshelf combination… but I’ll try to shorten it down.
- I want to make over my office to include a wall of built-in shelving.
- I was/am intimidated about making the built-ins so I was looking for pre-made cabinets and shelves that I could incorporate and just trim them out so they looked built-in
-
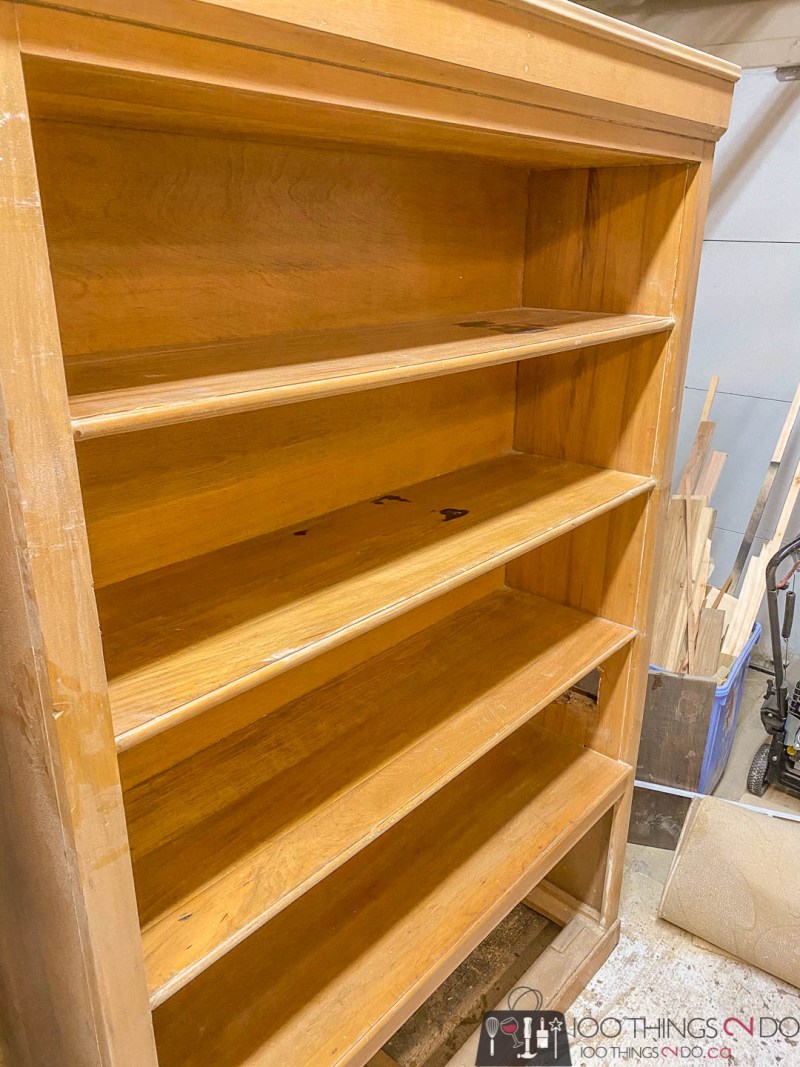
I found these on an auction site:
They are trimmed out as though they were built-ins already!
- I didn’t measure my space before buying them, so after I bought them (for $30 each) and lugged them home with my Step-Dad and boyfriend, I found that they were too big. 🤦🏻♀️. (I really am a donut. lol)
But they are SOLID MAPLE! The sides are doubled-up with two ¾” maple boards and the drawer is faced with a 2″ slab! These are ridonculously heavy and well-made.
- I begged friends and family members to see if anyone wanted the bookcases, but had no takers. I really didn’t want to sell them – I can’t buy maple for $30!
I started sanding to see what I was working with:
Oh yes, oh yes, OH YES!! How could I possibly get rid of them now – this grain is GORGEOUS.
- I took one bookcase apart completely to use as wood for another build I have coming up, but the second bookcase had some staining and damage that stain wouldn’t cover.
What number am I at? Oh yeah…
- I decided if I had to get rid of this gorgeous wood, I was going to make it look awesome and (hopefully) make some money on it.
Sand, patch, sand, prime, sand, paint, sand, paint, cut and attach a (sanded and painted) bead board backing…
As a black bookcase it is STUNNING!!!
It would have been even more spectacular stained, but with an outlet hole in the side (I’m assuming the previous owner cut it to access a plug for a printer or router).
With a fair amount of dings and dents that needed filler, and a large black stain in the wood (upper shelves), this piece had to be painted; the problems just couldn’t be fixed and hidden with a stain.
I left the side hole as-is – it could be disguised pretty easily with an outlet cover and you might never notice it – or you could use this black bookcase in your home office and set the printer on that shelf. Either way, it’s pretty inconspicuous.
The bead board backing made a HUGE difference don’t you think?
I could have put more work into it; replace the trim with crown moulding, add a more decorative baseboard, but at $40/gallon for primer, $78/gallon for paint and another $70 for the headboard backing – I had to gauge how much I could sell it for and not invest more than I’d get back.
Wanna see the black bookcase with the recently refinished black (oak) desk?
Now imagine the desk in the centre of the room and the black bookcase against the wall behind you… it really would make a striking masculine office!
I apologize for my garage staging, these are just too heavy to move in and out of the house by myself.
I’m CRAZY for this black bookcase!! When I get to my office makeover, the bead board is going to be a must.
Yes, I talked a lot for a post without any actual refinishing instructions. 😂
What can I say? I get excited.
How about a before and after?
Black bookcase makeover
Before:
After:
Before:
After:
I always love the finished product of my makeovers, but this one really will be hard to part with.
It’s heavy as hell! 😂
Have a great one!


