Hey 100T2D readers! I’ve got a GREAT project for you today, and a sneak peek at another great project that I’m showcasing over on House of Wood later this week: I figured out how to make a DIY round tray from a concrete form!!! You can use Concrete Forms to make different things, and there are companies out there that can help you with concrete forming and shoring equipment.
I’m so excited because I’ve racked my brain for months to figure out how to build/make a round tray without wasting a lot of wood, involving a router or creating pretty elaborate jig – and today I’m going to show you how I did it! (hint: it’s so easy I could kick myself!)
The lightbulb turned on while I was creating a tutorial for this footstool/ottoman for Jen’s blog; House of Wood. (which will go live Feb. 28/18)
Have you heard of concrete forms?
They are large tubes sold at home improvement stores that are usually used to form concrete for fence posts etc. They come in a range of diameters (I’m working with a 12″ diameter) and are usually sold in 8′ lengths.
These concrete forms are made of cardboard, but a really hard and stiff cardboard that doesn’t mush-up when wet concrete is poured into it.
Stiff enough to work as a lip for a DIY round tray!
I cut 2″ rings from my concrete form using a jig saw and then traced the inside of the form onto a piece of ¾” mdf (medium density fibreboard) that I had in the garage.
I cut the mdf circle with my jig saw (remember to wear a mask for this – mdf is terrible for your lungs!) and dropped it into the centre of my concrete form ring. I used a bit of wood glue around the edge, but the real strength comes from eight 1 ¼” finishing nails that I tapped in around the edge.
I used a bit of wood filler to hide any imperfections in my jig saw cutting and sanded everything smooth.
Yup, you can totally sand the concrete form – but only with a fine grit sandpaper or it will shed some of the cardboard. I used a 220 grit sandpaper to remove any really rough areas – but the fine sanding of your DIY round tray will come after it’s been primed.
Because cardboard and mdf are both very porous and will warp easily with extended exposure to moisture, it is imperative that you prime your round trays. The bonus of priming is that it will also level off any bumps in the concrete tube and allow you to sand everything really smooth (with 320 grit sandpaper).
I made a few round trays so that I could try different sizes and finishes. If you want to make a smaller tray, or a nesting set, all you have to do is trim a couple of inches out of the concrete form and make a smaller mdf bottom to fit within it.
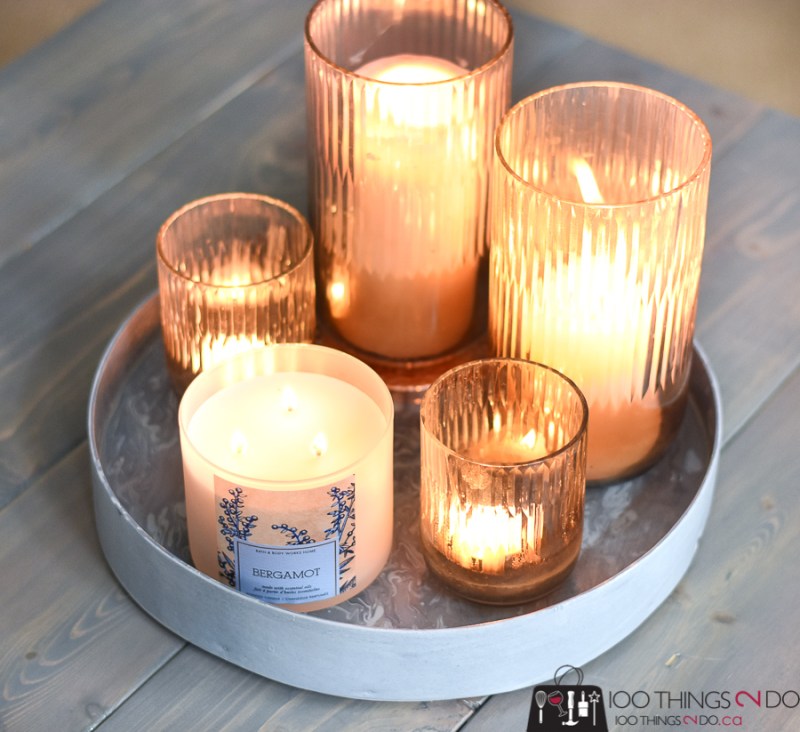
I tried a “dirty pour” finish on this DIY round tray; dripping and drooling various paints on the surface and then tipping and tilting until it’s spread around in a marbled sort of pattern.
I added a coating of varnish over top of this, but an epoxy resin would really give it a gorgeous lacquer shine.
Put it on your coffee table to corral candles or flowers for a pretty vignette.
Or, set it on display on your shelves until you want to use it (form and function!)
The second DIY round tray I painted in a traditional white (Benjamin Moore’s Advance formula for durability).
It’s so PRETTY!
I have my DIY round tray sitting on my footstool/ottoman in the above photo – it makes a perfect little table top for my tea, a book, my glasses and a little treat.
Use one on your bathroom counter to display and organize pretty toiletries, or on your nightstand for a small bouquet and a ring dish.
Hang them on the wall with a mirror in the centre for a nautical look or add a clock mechanism and create your own custom clock.
The concrete form was $14 Cdn for 8 feet (which would make ~45 two-inch round trays). MDF only comes in 4′ x 8′ pieces in my neck of the woods, so it’s a bit pricier at $44 Cdn. Your best bet is to get leftover or scrap pieces from larger projects, friends or family members that might not remember it’s in their garage. Any ¾” wood would work; you just need the thickness for stability and to give you something to nail into.
Would you know that this DIY round tray was homemade and not store-bought?
Would you guess that it’s made from cardboard (a very tough cardboard, but cardboard nonetheless?)
I’m still working on my third tray, and if it turns out I’ll post it as a separate tutorial – I’m trying to faux-finish it to make it look like wood. If it doesn’t turn out, I’ll pretend that I only made two.
Don’t forget to check out Jen’s blog this week for the how-to on the fantastic ottoman.
Have a great one!
Linked to:


I am wondering how you got the lip or edges of the tray? Did you simply pour the concrete into the form and swirl it on the edges to create the sides? Or did you have two rings to create a form of sorts?