Week 3 progress of the Fall 2018 One Room Challenge includes stripping down an antique door, painting and flooring
The bi-annual One Room Challenge (with media partner Better Homes and Gardens) is in Week 3 (of 6) and the checklist is going down!
The ORC is a challenge to completely makeover one room in 6 weeks. We’re talking flooring, lighting, plumbing (if applicable) and of course paint – all to be documented on our blogs over a 6 week period, with the final reveal of the completed room scheduled for November 7th. If you’re in a similar situation where you are giving your office a makeover, Click here for an overview of the best flooring nailers, as having the right tools will help make the job a lot easier.
There are no prizes for this challenge (unless you make a whopping impression on Better Homes & Gardens). It’s about inspiring others to take on a challenge in their own homes by showing how easy (or difficult) it is. You’ll see room transformations week-by-week by visiting the ORC Guest Participants link page.
To remind you what our goals are for this basement home office, this is the mood board we are working towards:
and this is the checklist of items on our to-do list:
Rustic industrial basement office
pack up roomdemo cabinetspatch drywallpaint wallsstrip flooring- install faux brick wall
- sand, prime and paint doors and trim
- install new baseboard
- install recessed lighting
lay new flooring- zinc finish on filing cabinet
strip door for desk and stain- build pipe shelving
- stain shelf boards
- build pipe desk
- order plexi-glass for desk top
- office seating
- staging/styling
- install new casing
- source furniture
- office artwork?
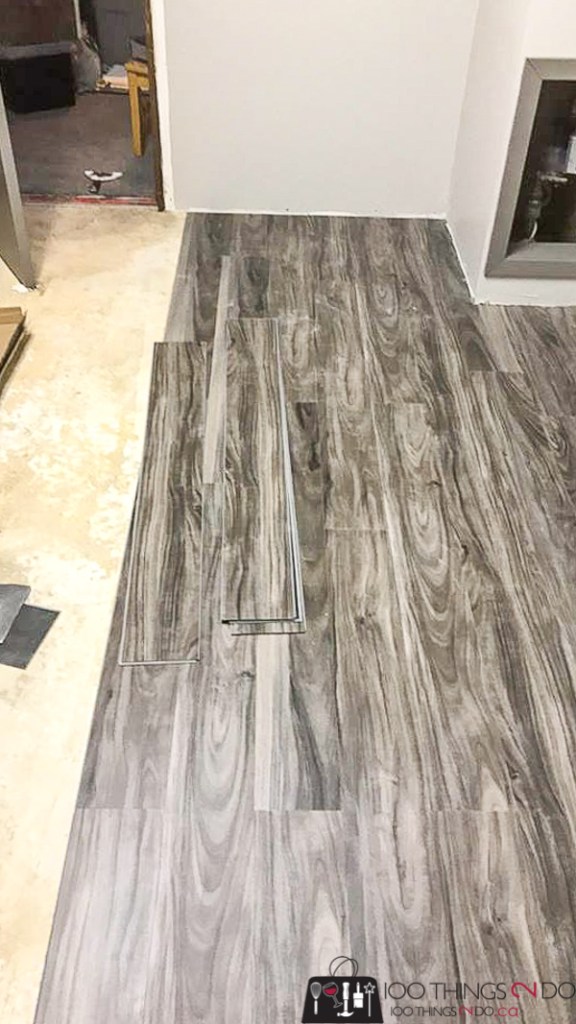
While Sherri worked on installing the new (and spectacularly gorgeous) flooring,
(Isn’t it stunning? The wall colour (BM’s London Fog) is a perfect complement to the highlights in the laminate.)
I got started on the antique door desk:
This is an oooooold door. An ooooold wood door. An old, heavy and covered-with-layer-upon-layer-of-paint door – so I had to bring in the chemical stripper (which I hate using) to clean it up. I though about using a commercial door repair service but I wanted to make sure I got it right for me instead.
I didn’t do a lead test, but I worked in a mask and gloves just in case any layer of paint on this beast was lead – better safe than sorry.
After two coats of paint stripper, I finally made it down to this:
I gave it a good sanding and was so incredibly disappointed to find that someone had actually applied a veneer to a wood door. Who would do that?
Our best guess is that the builder wanted the look of a more expensive wood over a plain pine door – fair enough – but it left me with this mess to deal with:
I could have used a planer to get right down to the bare wood (pine) but then all the trim work in the door panels would have been destroyed. Since Sherri wanted a roughed-up, antique looking door, we decided to see if we could stain over the patchy areas to create some kind of even finish.
The first coat of stain (dark walnut) wasn’t enough to cover the yellow veneered areas,
but a coat of ebony stain over top did make the finish more rich and even and Sherri was pleased with the outcome (you’ll have to see the finished desk in the final reveal).
I will however, give you a sneak peek at the iron pipe Sherri put together for the desk base (please forgive the photo quality, it was late and the photo was taken on a phone)
Besides the flooring install and the desk build, we also managed to get the new baseboard painted and got two coats on the walls.
I know, that’s a bare wall and a pretty boring photo – but remember where we came from:
That’s a spectacular makeover if you ask me.
This week I plan to tackle the filing cabinet makeover and finish painting out the remaining trim and doors. Sherri will finish up the flooring and the desk base and we might even get to installing the faux brick wall. (fingers crossed)
I don’t want to jinx our progress, but everything is coming along beautifully – we might even make the Week 6 deadline!
Can’t wait to show you our Week 4 progress! Come back next Wednesday (or subscribe to the blog so you don’t miss anything) and see how far we get.
Rustic industrial office makeover – One Room Challenge, Fall 2018
- Week 1 – Before photos and storyboard
- Week 2 – Demo, purging and emptying progress, paint
- Week 3 – Special project: Business logo sign!
- Week 3 – Door desk, paint and flooring
- Week 4 – Faux zinc filing cabinet
- Week 5 – Accent wall, baseboard, trim
- Week 6 – ROOM REVEAL!
Be sure to check out the ORC Guest Participant page for more awesome makeovers!
Have a great one!


