I’m so excited to share today’s bookshelf makeover with you!
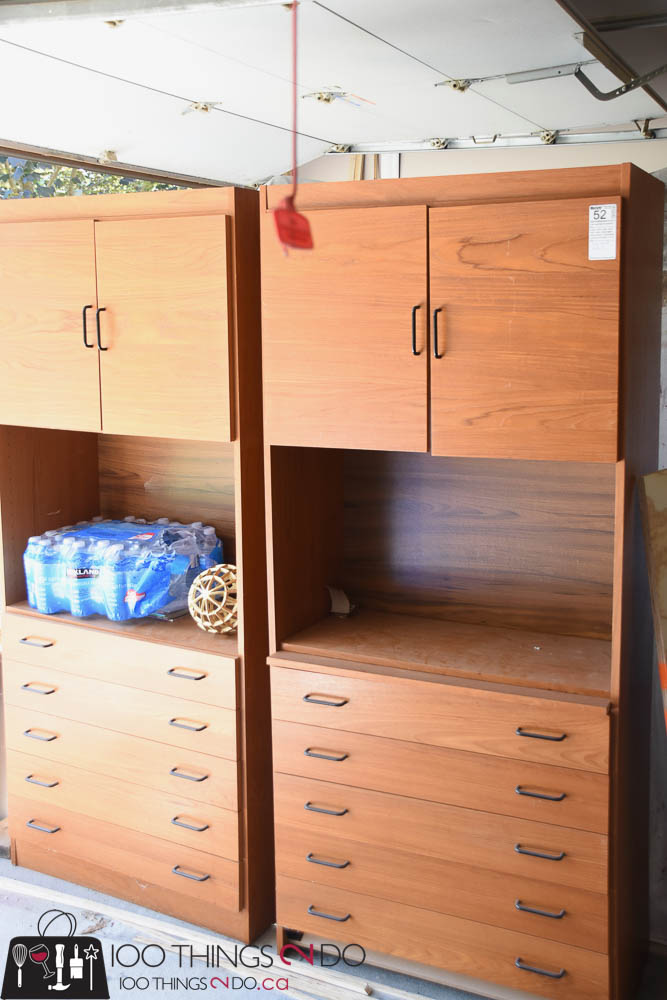
If you’ve followed along you know that I’m in the midst of an office makeover and as part of that makeover I picked up these two “teak” cabinets;
I put teak in quotes because that was how they were advertised – but when I went to pick them up I found it was really MDF with a teak veneer. Frustrating, but since I planned to paint them anyways it wasn’t that big a deal.
It was all of those drawers that had me drooling; I’d been searching online to find cabinets or base units with drawer storage, but the price tags were pretty hefty. I was able to pick up both of these units through Maxsold.com for $150.
I sanded both units down with 120 grit sandpaper – enough to remove the glossy finish, but not enough to sand right through the veneer itself.
I followed up by spraying two coats of Zinsser Bullseye 1-2-3 primer with a light sanding between coats.
I was on the fence about whether or not I should do a third coat of primer because the tannins from the veneer really bled through. The photo above doesn’t do it justice, but immediately after putting on my first coat of primer the paint turned beige.
I read up online and most tips said that two coats of primer should be adequate, so I risked it and added two coats of Benjamin Moore’s Advance formula paint in (untinted) white.
I debated about buying new handles for the home office makeover / bookshelf makeover – but the drawers are relatively shallow so I didn’t want to bring in anything too heavy-looking. We’re also talking 20 drawer pulls here so, while I may change my mind down the road, new handles would have fairly pricey.
Instead I washed the handles down with TSP and then used Rust-Oleum Specialty Metallic spray paint in gold.
*Update: 09/14/17 The spray painted handles didn’t last and the paint was chipped and scratched within a few weeks. Please click over to the “Why you shouldn’t spray paint handles” blog post for the details.
Ready to see the after?
What!?!
I KNOW!
Gorgeous fabulousness!
The handles are absolutely perfect – just a hint of gold and light enough not to overwhelm the bookshelves.
I changed up some of my office accessories to tie things together (in another post), so the overall feeling is light and airy.
Pretend you don’t notice that my storage boxes don’t have lids. I was so excited to show of the bookshelf makeover that I couldn’t wait until the box lids had completely dried.
I picked up my cute little Kiwi at Crate & Barrel while in Atlanta and he sits front and centre.
I picked up these cute storage boxes ages ago and haven’t been able to decorate with them. Now they’re a perfect match to the new room!
Right now my new home office is looking fairly tidy and organized – but it will be a working office, so there are no guarantees that future photos won’t have files and office supplies everywhere. By the way, I was thinking about getting some more supplies from a site similar to this Online Office Supply Store, OfficeCrave.com, what do you guys think?
This blog post will serve as my visual evidence that “once upon a time” it was beautiful.
I do still have the cabinet doors should I ever decide to re-attach them, but for now I prefer the airy feeling of the open shelves.
This bookshelf makeover was just one step (of several) to takeover and makeover Hubby’s old office into my new home office and craft space – on a budget.

(forgive the chaos of cords under the desk – that too will get organized soon)
Here’s the before and after:
- Random orbit sander
- TSP cleaner
- Zinsser Bullseye 1-2-3 primer
- Benjamin Moore Advance formula in pearl finish (untinted)
- Rust-Oleum Specialty Metallic in gold
- Wagner Home Decor Sprayer
Have a great one!
Linked to:


Stunning! XO