One of my favourite things to do is come up with ideas to use up scrap wood. I think it’s fair to say I spend more time creating with scrap wood than I do building the large pieces that generate all the scrap wood. Today’s shaped cutting board is another scrap wood project that is easily made (but no one will guess it) and a great gift idea for Moms, teachers, coaches or as a hostess gift.
*This post contains affiliate links to items I’ve used in this project. Using these links to purchase does not affect the price of the items in any way, but does provide 100Things2Do with a small referral commission to help keep the blog up and running.
Shaped Cutting Board
Start by gathering all of your non-pressure treated scrap wood. You don’t want to include any wood that has any sort of chemical treatment applied to it or it won’t be food-safe.
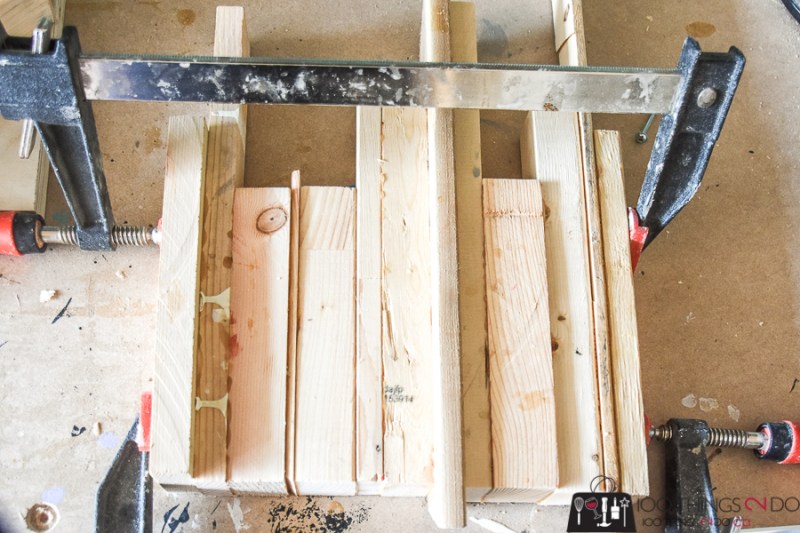
Using food-safe wood glue, glue all of those boards together and clamp tightly overnight.
I had the benefit of having borrowed a friend’s thickness planer, but if you don’t have access to one, just cut your scrap wood to approximately the same thickness/height and then sand down to smooth.
I was thinking this shaped cutting board might be a teacher gift for the end of the school year. Having written that, I’m pretty sure most teachers are “apple’d” out, but pear shapes are always in style. I’m not much of a free-hand artist, so I found a pear shape, cut it out of cardstock and then traced it onto my wood.
I cut my pear cutting board using a scroll saw, but you could easily cut it with a Rockwell Bladerunner X2
or a jig saw.
Sand the outside edges smooth (don’t worry about the middle just yet), and then coat with some leftover latex paint.
I should warn you – latex paint is NOT food safe, so your shaped cutting board should not have food put on the edges. Unlikely, but just in case, it’s out there.
Once your latex paint has dried, sand the front and back of your shaped cutting board with 220 grit sandpaper to remove any paint that’s run over the edge and to get your surfaces perfectly smooth. I drilled a hole in the leaf of my pear cutting board so that I could thread a leather string through for hanging.
Oil the front and back with cutting board oil, wipe off the excess and once dry, apply a cutting board wax
to the entire pear cutting board (including the sides).
This board is 11 ½” tall by 8″ wide, so small enough to tuck into a cupboard or hang on a backsplash.
The edge is a nice detail that you won’t find very often.
This would actually make a cute charcuterie board for a wine and cheese evening.
Easy, inexpensive, decorative and functional – you know those are my favourite words (and favourite projects).
Pin it for later:
Have a great one!
Linked to:


One Response