
One of my Christmas gifts this year (or last year I guess) were some laser-cut wood letters from a small company called Details 2 Enjoy.
I wanted to purchase their pre-made signs, but shipping from the US to Canada ended up being more than the signs themselves, so I opted for a smaller shipping package, and charge, and decided I would make my own, simple, rustic wood frames myself.
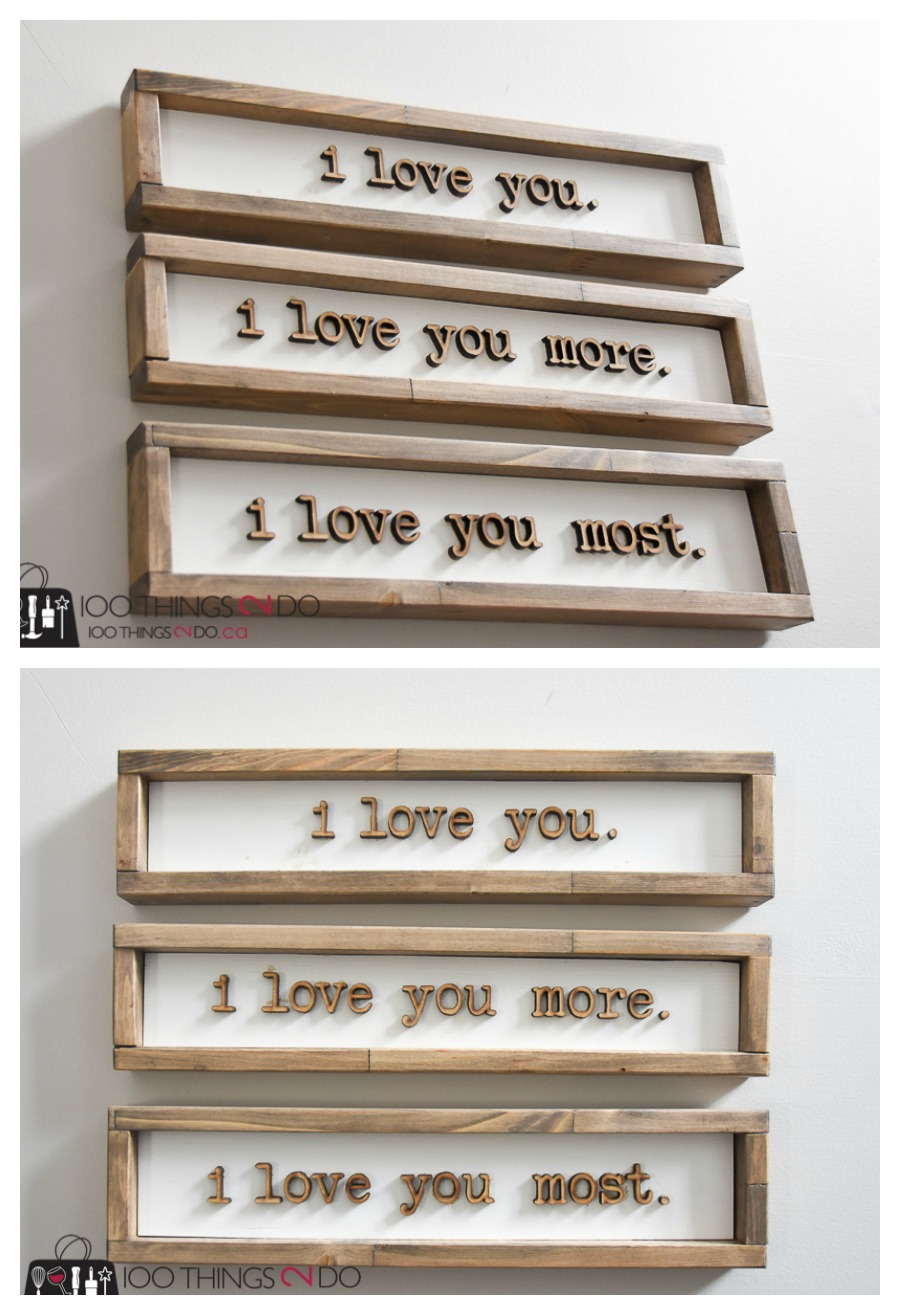
I started out by setting my letters out on a wood board to decide the size of the background I’d need. I cut it to size and then painted the backing white.

I then glued the laser-cut letters onto the white backing and was ready to build my simple, rustic frame.
There’s not much to this DIY really – you need a saw, some wood glue, a few finishing nails and sandpaper – these don’t even have to be power tools; a hand saw and a small sheet of sandpaper will be fine.
The wood frames themselves are lengths of a 1″x2″ board available at any home improvement store.

I measured the outside of my picture/quote and, knowing that I was going to use my favourite picture hanging technique, I decided to cut the side pieces first (the top and bottom pieces will be longer and will carry more of the weight of the picture).
I placed these side pieces on my picture and then measured the top and bottom lengths including the side pieces and cut.
I didn’t use any fancy angled cuts for these simple, rustic wood frames – I just butt the 4 sides tightly together and adhered them with wood glue and a finishing nail in each corner.

Once the glue had set, I sanded the front and outside of the frames down; because I was using a power sander I was able to hold it at an angle to give my wood frames a slightly chamfered edge.

That’s basically it!
Leave the wood raw, stain it, paint it – whatever you like. Re-insert your picture/quote inside the frame and tap a finishing nail into each side to hold it solidly in place.

So easy, so quick and so cute!
These were also sets of letters I received for Christmas from Details 2 Enjoy:

Small glue smudge – don’t look too closely – I’ll erase that later with a rubber eraser.
You can pick up wood letters from hobby stores or even the dollar store – but if you want these fonts exactly you’ll need to click over to D2E to order them. (Check out the laundry sign while you’re there – its gorgeous!)
I have some bigger builds and projects coming soon, but I thought a quick-and-easy might inspire you to DIY something this weekend.

I love these single signs – I’ve posted them in my foyer so the girls see them every day.

Save this for later on your Pinterest boards:

What else are you going to do during this ‘bomb cyclone’ (aka Canadian winter).
Have a great one and stay warm!

Linked to: