
Save hundreds of dollars by building your own DIY jersey display case to show off your favourite team, sport and/or player. Easy building plans here.
My Dad is a guy’s guy; he’s beer and football, dirty jokes and good times and his house is a man-cave…. which is fine and wonderful, but hanging his collection of football and hockey jerseys on coat hangers from wall sconces was a bit too manly for me.
I know, MYOB Shelly – it’s HIS house.
But I just want everything for him, even if that means butting in where I don’t belong and building a jersey case just in case he might like it.
I mean, I write a blog and I’m always looking for new builds to try and Christmas is just a few days away and the man is impossible to buy for…
and yes, I couldn’t leave well enough alone.
If you are, or know someone, like my Dad – that has several sports jerseys – then I should tell you that having them professionally framed is CRAZY-EXPENSIVE. We’re talking anywhere from $200 to $500 (Cdn) depending on how fancy you go with the matting and plaques etc. Six jerseys at $200 a pop = a serious dent in your bank account (and it would likely give Hubby a stroke). For most of us, that’s just not feasible.
So I built a jersey display case myself – to see if I could – and to come up with building plans so that you could make one (or many) yourself!
DIY Jersey Display Case
This post contains affiliate links – for full disclosure, please see side bar.
- 30 1/2″ by 38 1/2″ piece of 1/2″ plywood (choose a subtle grain)
- (3) 1″ x 3″ x 8′ select pine
- 1 1/4″ pocket hole screws
- 1/2″ finishing nails
- wood glue
- brad nailer
with 1 1/4″ finishing nails
- 36″ piano hinge
- 1/2″ wood screws and 1″ wood screws (for attaching hinge)
- magnetic closure
- 1/4″ plexiglass (or glass)
- matboard
at ~ 32″ x 40″
- needle and thread
- stain
- varnish/Varathane

Cut list
- 1/2″ plywood cut to 30 1/2″ by 38 1/2″
- (2) pieces 1″ x 3″ cut to 32″ long – with a 45 degree angle running opposite at either end. (long edge will be 32″ – see diagram above)
- (2) pieces 1″ x 3″ cut to 40″ long – with a 45 degree angle running opposite at either end.
- RIP REMAINING 1″ x 3″ board in half lengthwise (to 1 1/8″)
- (2) pieces 1″ x 1 1/8″ cut to 40″ long – with 45 degree angle running opposite at either end
- (2) pieces 1″ x 1 1/8″ cut to 32″ long – with 45 degree angle running opposite at either end.

Because I only built one DIY jersey display case (for now), I opted to buy the less expensive 24″ by 48″ plywood and then piece 2 of them together to make my 30 1/2″ by 38 1/2″ backboard. (You can see where I’ve glued and used pocket hole screws to attach the two pieces together.)
Drill 1/2″ pocket holes every 6″ around the BACK of your backboard – make sure you have the nicer/less flawed grain as the front.
My garage is jam packed with wood and partially completed projects right now, so I brought out my WORX Pegasus folding work table and sawhorse for this project. Granted, I was given the Pegasus in exchange for a review, but let me tell you, this baby was ideal for this project! I was able to build the entire DIY jersey case on this one platform – which comes with it’s own clamps as an added bonus. I’m not kidding, I love all WORX tools, but this one is going to be in daily use from here on out. #gamechanger
I lined up my 1″ x 3″ boards to be flush with the back of my jersey case and then glued and screwed them into place with 1 1/4″ pocket hole screws. Add extra glue at the mitred corners and clamp in place for a nice, tight fit.

Easy so far right?
Now for the front frame for the glass/plexiglass. You want your frame to be just wider than the box it is hiding, so I ripped my 1″ x 3″ board down lengthwise on my table saw – half (less the depth of the blade) is 1 1/8″, so set your fence there.
Cut your frame pieces to length – with 45 degree angles running perpendicular to each other on either end.
Before gluing your DIY jersey case frame together, you’ll want to create a “rabbit” for the plexiglass to sit in. To do this, I set my table saw blade height to 1/4″ to 1/2″ (depending on the thickness of your glass) and made multiple runs along each board until I had a cut-out that was ~1/2″ wide.
I tried to make a short video to show you how to make one… but you’ll notice the wood actually pushed my iPad out of place. UGH! Hopefully you get the idea.

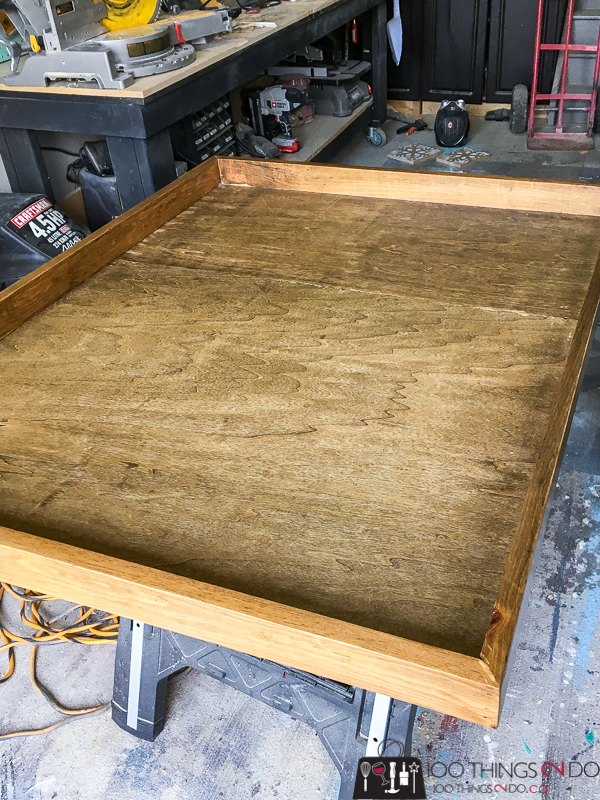
I forgot to take a photo until after I’d applied a coat of varnish to the top, but here is what yours should look like:

Use wood glue, clamps, and your brad nailer to hold the sides together. Double-check to make sure your frame is square and perfectly covers the jersey display case itself.
Sand, stain and varnish inside and out.
Once the varnish is completely dry, measure the length and width of the rabbit section of your frame; this will be the size to cut your glass/plexiglass.
I’ll be honest and say that I was nervous about cutting plexi – it’s expensive and I didn’t want it to crack or split anywhere – but I cut it on the tablesaw with no problems at all. (that might be beginner’s luck – so be careful). If you are a bit more of an expert than me, you can find a Delta sawbuck for sale online if you are needing a different one for your project, Don’t forget – safety first guys!

Use a clear silicone sealant to adhere the plexi inside the jersey frame. Let dry for at least 24 hours.
Attach your 32″ piano hinge to the inside of the frame with 1/2″ wood screws. Line your frame up with your base so everything is flush, and then attach the other half of the hinge to the frame with 1″ wood screws.

I chose to add a magnetic closure to my (Dad’s) DIY jersey frame. I don’t imagine the door would swing open on it’s own, but just in case the walls are crooked or something.

The frame portion of your DIY jersey display is done! Now to move on to the jersey itself…
How to mat / mount your jersey
Trace your jersey (body) onto a piece of black matboard and cut out.


The matboard should stretch the jersey just slightly so that there aren’t any/many wrinkles. Place your jersey inside of your display case to get an idea of how the sleeves will need to be folded to fit and then pin in place.

Using matching thread and teeny-tiny stitches, sew your jersey to the matboard where you see the red dots.


Once your jersey is attached to the matboard, you are ready to install it into your DIY jersey frame.
I used 1/2″ finishing nails under the jersey front, but through the matboard and jersey back and part way into the display case back.

Not too shabby eh?
Especially for “winging it”!

I attached a 200lb capacity french cleat to the back of the DIY jersey case and my Dad can attach the other half of the cleat to his wall once he’s brought it home.

There’s a bit of room in the case where you can insert a small plaque or ticket stubs, even a hockey puck if you’re framing a hockey jersey. Speaking of – a 32″ x 40″ jersey case is generally for football and/or hockey jerseys. Baseball jerseys are usually framed in a 30″ x 36″ shadow box.

Look how perfectly flush it closes. I’m not going to lie, I wasn’t sure how this was going to turn out; whether it was going to be a “what NOT to do” blog post or not, so when everything turned out almost perfectly (I’m not going to point out my mistake, but trust me, there is one) I was texting everyone with the happy-tango-dancer emoticon. lol
So – SURPRISE! Merry Christmas Dad! Made with lots of love (and lots more swear words).
A special thank you to WORX tools for the indispensable WORX Pegasus folding work table and sawhorse; if you need workspace in your workshop (She-Shop) portable and heavy duty, you NEED the WORX Pegasus. I might even buy a second one myself and attach them for extra assembly space.
Check it out:
I was provided with the WORX Pegasus folding work table and sawhorse in exchange for writing a review. As always, my opinion is honest and sincere and I would not promote anything I wasn’t genuinely pleased with.
Have a great one!
Great job! AWESOME Jersey! Go Pack Go!