If you could whip out an easy, cheerful, bright and full Easter wreath for less than $20 and in about an hour wouldn’t you try? Then you’re definitely going to be all over this dollar store Easter wreath I made a few years ago.
Dollar stores are chock-full of Easter bits and bobs now, so I stocked up on supplies. I’ve actually over-bought here, I didn’t use the green deco mesh and you only need a few pipe cleaners.
Dollar store Easter Wreath Supplies
- deco mesh in a few Spring colours
- wire wreath form
- wire ribbon/s
- wire cutters
- pipe cleaners
- accessories to decorate
Deco mesh usually comes in rolls that are about 18″-24″ wide, and you can totally use those to make your wreath/centrepiece; it will make your wreath really large and full – unfortunately, you can’t usually find that size at the dollar store. Instead, pick up a few rolls of the smaller deco mesh which is easily available and is only about 6″ wide.
Cut your deco mesh into pieces that are about 8″ wide; enough to roll over themselves once.
You’ll be left with an explosion something like this:
Cut your ribbon pieces to 6″- 8″ and flag the tails (you can do this by folding your ribbon in half length-ways and cutting on an angle from the centre fold out towards the wired edges.
You’ll also want to cut up your pipe cleaners into thirds using your wire cutters.
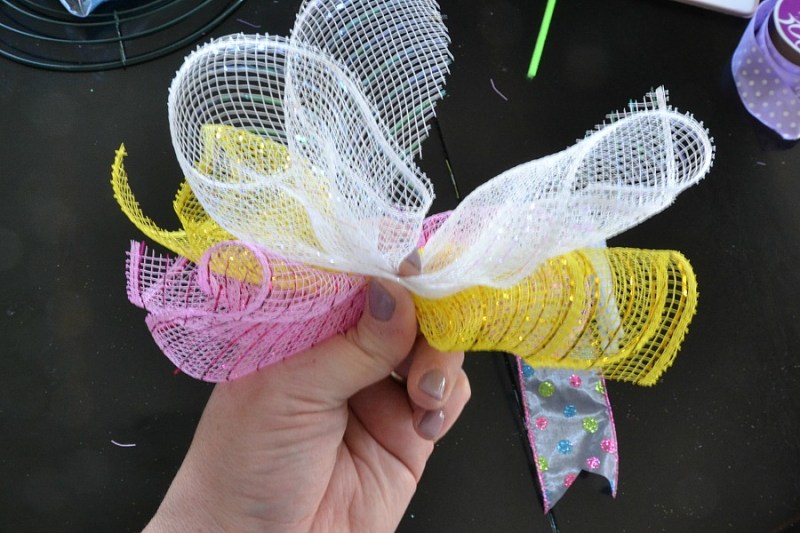
Grab three pieces of deco mesh and a piece of ribbon and pinch them tightly in the centre. Any colour combination is fine.
Wrap your pipe cleaner piece around the pinched area and twist to hold.
Continue making these little bundles until you’ve used up all of your deco mesh.
You’ll have a new explosion that looks something like this:
To keep my dollar store Easter wreath random, I mixed up the colours in my bundles so that I wouldn’t get any pockets of colour. Alternatively, and I only thought about it after I had already finished, you could make all of your bundles white or orange and top your finished wreath with a bunny tail (so it looks like a giant bunny butt), or green deco mesh to look like a carrot patch. (See the image at the end of this post; for 2023 I created another dollar store Easter wreath in all green with a lamb)
Starting in the centre of your wire wreath form, attach your deco mesh bundles and twist into place.
I attached one bundle to each cross wire to make sure I had even spacing, then I filled in the gaps with additional bundles. At this point you don’t need to worry about fullness on your easy Easter wreath – it will come, so make sure you have enough deco mesh bundles for the remaining rings of your wire wreath form.
I divvied up the remaining bundles to make sure I had (roughly) an even amount for each ring.
Attach your bundles to the next ring, and then the next until you run out.
Flip your easy Easter wreath over, fluff the deco mesh and straighten your ribbons.
You could stop here and have an absolutely gorgeous wreath, but I decided to add a few little details to take it a step further.
You can use styrofoam eggs and either interweave the pegs into the mesh or hot glue a few eggs in place. I also added some bunny ear clips to the centre.
I wanted to create this easy Easter wreath to use as a centrepiece on my dining room table;
and because we used the 6″ deco mesh spools it is the perfect size (without taking over the entire eating space).
Your dollar store Easter wreath is however, full enough to use on your front door as well;
The grand total for this cutie is $15 (not including the ribbon which was leftover from last year) and it took me an hour from start to finish (and that’s including photographing the steps).
Dollar store Easter wreath 2023
Amazon affiliate links to supplies for this project
Click image for details and pricing. For full Amazon affiliate disclosure, please see bottom of the page.
Have a great one!


