
Build this Crate & Barrel “Strut Bookcase” knock-off for about $39 US (versus $799) with these free building plans for my freestanding, angled bookcase.
I’m happy today guys…
I was “nudged” back out to my She-Shop to get building again and after I (grudgingly) did, I felt inspired.
Frustrated with my errors (listed below), happy I could fix them, happy to have company to help and VERY happy with how this freestanding, angled bookcase turned out!
I started with this image I found on Crate & Barrel:

This is their “Strut Teak Bookcase” and is only $799 (US) for one.
Granted, teak is expensive, but this was certainly a project worth attempting a DIY from right? Especially since I had an unused 2″x 10″ just sitting in my shop waiting to be used.

The dimensions of the angled bookcase on Crate & Barrel are 76″ tall by 17″ deep by 30″ wide.
We created a slightly smaller version at 57″ tall, by 16″ deep by 27″ wide – this worked out better as far as shelf widths went as we were able to buy “good-one-side 24″ x 48″ x ½” thick plywood to minimize waste.
Yeah, that was a fluke – but I’m going to pretend it was intentional. lol
I have a HUGE confession to make…
I am TERRIBLE at angles: I can’t calculate them, I barely know how to cut them, I certainly can’t measure them and I definitely can’t create them in Sketchup. Any projects you’ve seen on the blog over the last 7 years that have included angles, have been the result of much smarter minds than mine…. and this is no exception. (Thank you Chris!)
We started by ripping down my 2″ x 10″ x 8′ lumber to create four 1 ½” boards. These are the verticals for our freestanding, angled bookcase.
We cut two of them down to 57 ¼” to act as the back pieces and then cut two smaller pieces at 1 5/8″. To save your fingers, cut from a long board with one end being 90° and then set your mitre saw to 11° and cut the other end. You’ll end up with a piece that is 1 5/8″ long at the bottom and 1 ½” long at the top (short side).

Take your other two long boards and cut one end at an 11° angle. This will be the base of your DIY freestanding bookcase. You can cut the top of it as well if you like, but for a perfectly smooth top edge, we left this to the end of the project.
My progress photo for our angled bookcase looks a bit different… we were going to skip the small angled piece in the middle originally, but then the verticals ended up crazy long and leggy and too narrow to put a shelf on. This little cross section makes a much nicer finished look and size. We used wood glue and clamps to hold it between the straight and angled vertical pieces.
Double-check the spacing at the bottom is 16″ from outside edge to outside edge.

Since we had lots of the 2″x10″ board left, we ripped down strips at ¾” wide on the table saw. These will be the shelf supports and you’ll need 8 of them each at 24″ long.


All of this out of one 2″ x 10″!
I used my pocket hole jig set at the ¾” mark and drilled two holes in either end of the 24″ boards. These will face the back of your angled bookcase, so make sure you drill into the “ugly” side of the wood.
Attach these shelf supports per the measurements above, between the two straight verticals using wood glue and 1 ½” pocket screws. The supports are centred on the vertical – so inset 3/8″ from either edge of the 1 ½” vertical board.
Attaching these shelf supports between the angled boards is a bit more involved…

We attached the shelf supports at the heights above BUT we only screwed in the top screw on either end… this is where you’ll want to use a level to make sure your support is perfectly vertical (and not following the angle of the frame). Once you’ve found level, drill in the second screw.
These supports for your angled bookcase will be inset 3/8″ at the top, but NOT the bottom.

This is the point where we lifted the angled bookcase up onto the mitre saw, straight vertical against the fence, and cut off the excess top pieces at a 90° to give a nice even top at 57″.
I could have told you to cut an angle here, but like I wrote above – I have no idea what it was, and this was super-simple.
We cut the shelves from ½” G1S (Good 1 Side) plywood – 24″ wide by the varying depth measurements in the diagram below.

I applied ¾” birch edge banding to 3 of the 4 sides of each shelf by wrapping it around each board and then ironing in place. You’ll want to do the sides as well because they are visible between the vertical supports.

Trim off the excess carefully with a utility knife, or edge banding tool if you have one.

We applied wood glue to the shelf supports and then set each shelf on top so that the front edge lined up with the front edge of the angled vertical. I used a few 1 ¼” pin nails to hold in place, but the glue will be strong enough once dry.
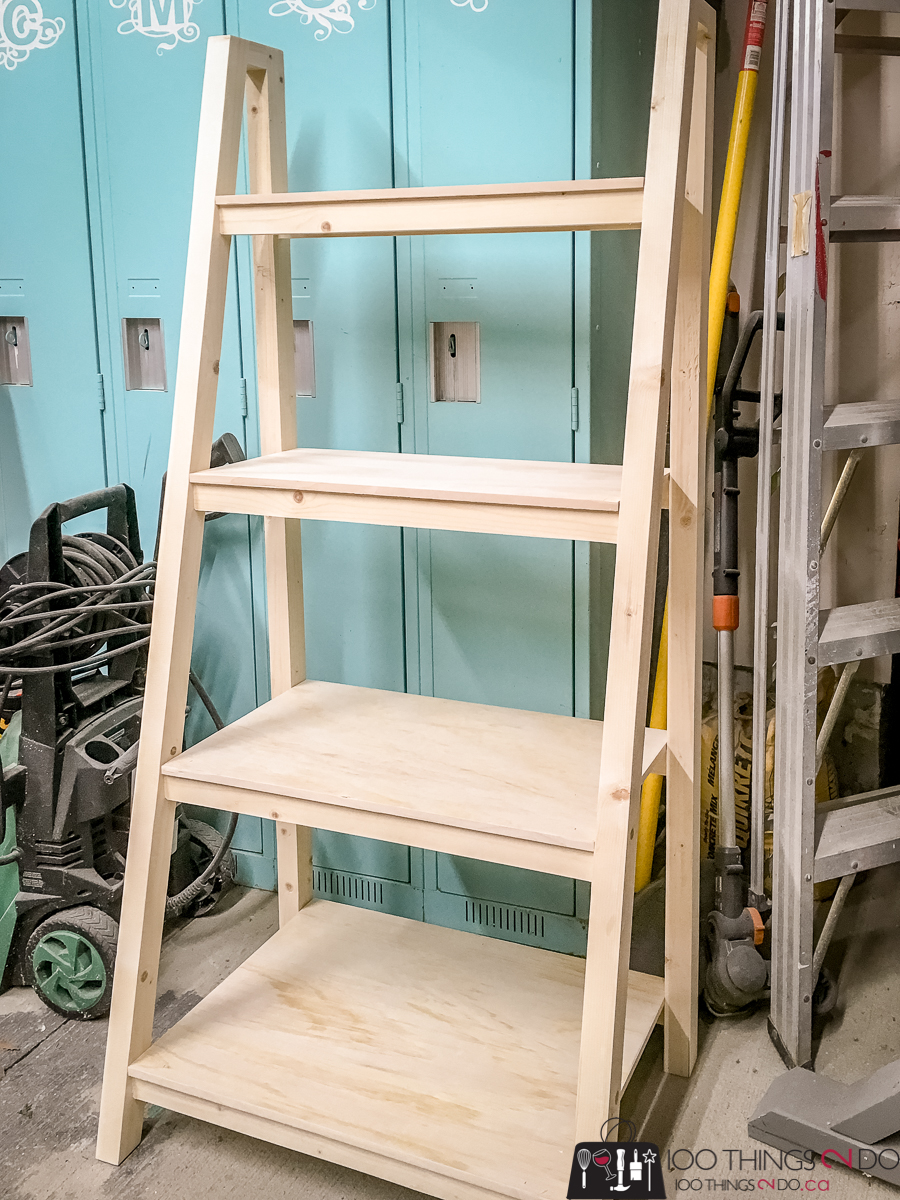
You can see in the photo below how the sides of each plywood shelf are exposed between the two verticals, that’s why edge banding is preferred here for a nice, clean finish.

He’s handsome right?
And if you scroll back up to the $799 US Crate & Barrel photo, you’ll see that we ended up just about bang-on in appearance of their freestanding bookshelf (if not size).

Did I mention that this was made from ONE 2″ x 10″ x 8′ board, and a couple of ½” quarters of ply?

I tried to replicate the colour of the teak bookcase, but spruce has a much larger grain, so it’s not quite as fine looking.
But then it’s also not $799 either?
I guesstimate my total to be $51.50 Cdn including a ¼ can of Triple-thick varnish (I already had stain, sandpaper and pocket screws in the She-Shop). That’s roughly $39 US, or 1/20th of the Crate & Barrel price… you could make 20 of these DIY angled bookcases for $800!!


I’m trying a new filter on my photo editing… not sure I love it?

I’ll be making more of these in the near future; I can imagine a white one in a child’s bedroom to store bedtime stories and stuffed animals. I’m picturing another made from cedar with slatted shelves to sit out on the patio for a tiered garden of planters or herbs. I even think that if I made the shelves a bit deeper to hold a lamp, it would make a neat nightstand on either side of the bed. Oh! What about in the family room to hold blankets and board games!
Yup – building more angled bookcases VERY soon.


A nice dangling plant like in the Crate & Barrel photo would have been better on the top shelf, but my little fake jobby will do until my green thumb grows in.

In hindsight I would make a few changes:
- I would have looked more closely at the last photo and edited out my central vacuum plug. (ugh!)
- I would have been more conscious of knots to try and minimize the amount on the front facings
- I would have sanded the front and back verticals BEFORE gluing them together – getting in between with your hand is a knuckle-buster
- I would have tested out stain combinations instead of staining it twice and still not being entirely thrilled
- I might have tested out other photo filters for a more consistent hue. lol
But hey, it wouldn’t be an article from me if there weren’t at least a few mistakes right?

Overall, our DIY freestanding bookcase turned out really well, and with these free instructions you can whip out as many as you want.
Now shoo, go get to work and see if a little shop time doesn’t leave you feeling inspired as well.
Have a great one!
Love it!
The knots make it look more natural. Not sure how you made the angle pieces on the top sides. This is one part I always get stuck at.