Looking to upgrade your unfinished basement on a budget? See how I painted my exposed basement ceiling – including costs, colours, tips and how-to.
Happy Easter everyone!
I’ve been quiet on here for a couple of weeks now because of a fairly large project I’ve been working on…
I’m FINALLY building/creating a budget laundry room!
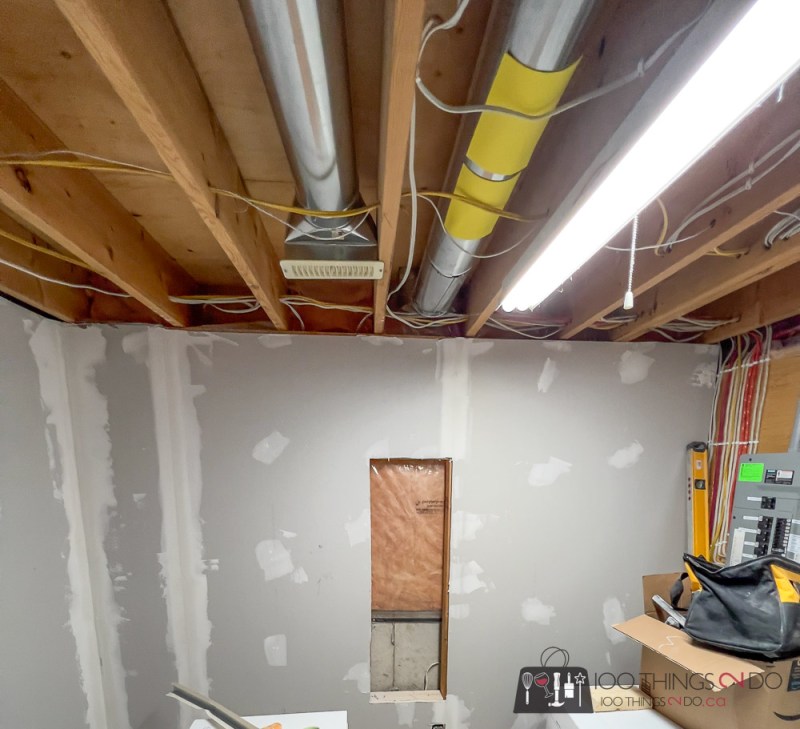
No, it won’t be all fancy cabinetry and perfect lighting – maybe someday down the road – but it will be a drastic improvement from this:
Your typical basement laundry room I think?
Exposed ductwork, pipes and wiring, with tufts of fibreglass separating the wiring from the metal. Three walls were framed, but the wall under the window wasn’t, which was holding me up from drywalling.
The linoleum on the floor was curling at the walls and had some rips and tears in it in the room.
Just blah.
I need more than “blah” – especially if I can do it on a budget.
This laundry room makeover involves:
- painting the unfinished ceiling
- hiding the electrical panel
- framing
- drywall
- painting walls
- adding trim
- in-wall storage
- shelving
- new laundry tub
- new flooring
- new folding table over washer and dryer
- new accessories, like in-wall ironing board and drying rack
What can I do to make my basement ceiling look better?
Yes, the whole room needs to look better, but I want the paint, dirt, dust etc to drop down, so I started from the top and worked my way down. I could have put in a drop ceiling, but it would NOT have been easy at all. There are pipes and ducts underneath the ceiling framing studs, and I really have no idea how to trim all of that out.
Drywall was out because the framing bill would have been insane, and would also require new lighting etc. etc.
I decided that painting was the best option for my space given my budget, time, and the amount of use the room gets.
How do you prepare an unfinished basement ceiling?
First, and most importantly, the wiring should NOT ever touch metal work – pipes or ducts. My first job was to remove all of the tufts of fibreglass that the builders had left, and replace them with foam sheeting. My friend/contractor confirmed that inexpensive foam sheeting from the dollar store would suffice, so as I pulled each tuft out, I had a piece of sheet foam – with double-sided tape on the back – ready to slide into place.
You can see in the photos where I tucked yellow and blue sheets anywhere where a wire might come into contact with metal.
The colours aren’t great, but it’s already an improvement over the random gloms of fibreglass 😂
(This post contains links to Amazon items I used. For full Amazon affiliate disclosure, please see sidebar or bottom of the page)
Should you paint over wiring in an exposed basement ceiling?
Again, I’ll defer to the expertise of my friend/contractor, who assured me that it really doesn’t matter that much. The wiring is all encased in plastic tubing of various colours, so paint won’t actually touch the wires itself. Should I need to determine the colour of any given wire, a simple scratch with my thumbnail will remove the paint. Hot and cold pipes will feel hot and cold, and ductwork is just a pipe for air – so no fire hazards there.
Preparing for painting an unfinished ceiling.
I used a swiffer and dusted each area before I primed it. I should probably have done the entire room first, but I got lazy and worked in 6′ sections at a time. I borrowed a work platform to work on and it made life SO MUCH EASIER! I could have used a small step-stool, but I would have had to move it every 3 feet or so. With the platform I was able to cover about 36 sq feet at a time before having to move it.
Yes, you do need to prime an exposed ceiling.
It helps paint adhere better, prolongs the finish, and blocks the tannins in the exposed lumber. This is especially important if you are painting your unfinished ceiling white.
Did I do this?
Yes and no. I *should have bought a more expensive, tannin blocking primer – a shellac primer would have been the best option. Instead I bought a mid-grade primer.
My reasoning: I needed about 4 gallons of primer to prime the ceiling (3 coats) and the new drywall in the laundry room. Stain-blocking primer is considerably more expensive and I didn’t want to waste it on walls that didn’t need it. For a cost savings – that I may regret later – I went with a mid-level primer; Benjamin Moore’s Fresh Start High-Hiding all purpose primer. It will do a decent job of keeping the yellow of the tannins at bay, but I’m not fooling myself – the ceiling will yellow over time.
The great news is, the basement has a yellow tinge to it anyways, so that will disguise it for a bit longer. lol
How to apply paint to an unfinished ceiling.
I actually started out using a 4″ foam roller and a 2″ paintbrush to apply my primer. It can be done. It sucked, and takes 5 times as long, but it can be done.
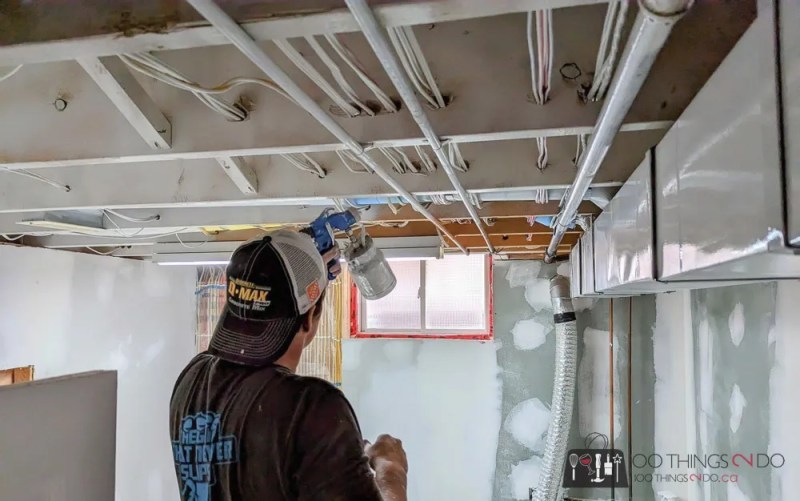
After a session of swearing and some helpful tips from Earlex, I was able to get my paint sprayer up and running which made the job SO much easier.
I went in prepared and had protective eyewear and a mask and a hat to protect my newly coloured hair – but as the goggles got covered with overspray, and the mask started to steam up – all PPE came off. (I am hanging my head in shame). The paint gods did punish me however, and I got more than a few spits in my eyes and I’m pretty sure I drank about a teaspoon full overall.
After my first coat of primer, you can see areas I’ve missed, and the colour of the wires are still showing through.
I ended up applying 3 full coats of primer to the exposed ceiling, wires and ductwork. Maybe I should have done one more since I didn’t use a paint over top? Regardless, 3 coats is really good coverage and hides everything I want hidden really well.
What colour should you paint an unfinished basement ceiling?
There are lot of opinions on this:
White: makes the ceiling feel higher and allows more light to bounce around in the room making it feel brighter… but it doesn’t hide wiring etc as well and tannins from the framing can bleed through without a quality primer and a few coats.
Black: will hide all of the wiring and ductwork better, and offers a much more dramatic, “finished” look. Black will also hide any tannin bleed-through, so you can get away with a cheaper primer and fewer coats (get your primer tinted black before starting)… but it will show dust and cobwebs much sooner and will make the ceiling feel lower.
Grey: runs a middle ground; it lets more light bounce around the room and will make the ceiling seem higher than with black, but it will also show yellowing sooner. Grey does give a softer, more cozy feel though.
Match the colour of the walls: This will give your unfinished room a more finished/polished look. A warm and welcoming feel and a curated/designer-type look. The only risk with this is if the tannins bleed through the framing lumber and make areas of your ceiling very obviously not the same colour as the walls.
To be cost-effective – this is a budget makeover after all – and to make the room as bright as possible, I opted for white. Primer white with no paint over top. This gave me the most bang for my buck and made the most efficient use of my time as I could prime the ceilings and walls at the same time without having to clean my paint sprayer or worry about overspray.
If you are going to add a coat or two of paint over your primer coats, choose a flat sheet or a ceiling paint. Any other sheen of paint (eggshell, pearl, satin etc) has low gloss reflectance in the paint which bounces the light – in the case of an unfinished basement ceiling, you really don’t want to draw light/attention to imperfections or variations.
Want to see the after?
I apologize for the angle – it’s a 10×10 room so getting a photo with the washing machine, dryer and deep-freeze in the way was difficult.
But I think it’ safe to say it’s considerably better?
Here’s a sneak-peek of the room so far:
There is still new flooring to install, trim work to be added, new laundry sink… but it’s coming along!
Pin it for later:
So how much does it cost to paint an unfinished / exposed basement ceiling?
Well, the 5 gallon pail of primer came in at $197 CDN. I used about 3 gallons of that on the ceiling alone, so that is approximately $118 CDN.
The Earlex 5500 paint sprayer is pricey at $380 US, but I believe there are rental options available at certain home improvement stores. Alternatively, the 4″ foam rollers and a paintbrush are an option as well – albeit a tedious option.
The foam sheets were $4 CDN for 40 craft sheets – so negligible in the grand scheme of things, and I ended up donating the remaining 30 to a little crafter.
If you want to protect your flooring, or any furniture in the room then it’s worth investing in drop cloths or plastic sheeting. Plastic sheeting can be picked up for about $10 US and will cover everything in a 10×10 room.
Not a bad budget-option – took about 3 days to complete (including drying time), and it looks SO MUCH BETTER.
This is a project that is definitely worth the effort.
Have a great one!


One Response