I’m applying to be a Silhouette brand ambassador and one of the requirements was to come up with a tutorial (with photos) of a simple project of my choice.
I was torn, do I do something so ‘out-there’ they can’t help but notice me (think papercut purse or tattoo template), or do I play it tame and come up with a highly pinnable image?
There’s not much you can’t do with the Silhouette CAMEO®, but I couldn’t come up with a tattoo idea I was willing to have applied to my body – no matter how impeccable the stencil.
I opted to create a personalized pet food container for my fur-baby Lacey.
Something like 1/3 of the population has a pet, so this seemed like a more SEO option than a tattoo on my a$$ of Rosie the Riveter.
Don’t forget though that if you are getting food for you pet, then you need to make sure that you are getting the right sort of food for them. Why not check out something like this Pet Food Exposed page to help you figure out what you should get for your pet.
Supplies Needed:
- Silhouette CAMEO®
- Silhouette adhesive vinyl (in two colours)
- Puppy Paw image Design ID #55664
- Silhouette Transfer Tape
- large pet food container with an air-tight lid
- pet scoop (available for free at many pet food stores)
- command hook
- optional: plastic cable tie
Step One: Open Design In Silhouette Studio®
- Open the Paw print design in Silhouette Studio®
- Resize your design to fit within the frame of your pet food container.
Step Two: Separate Design Pieces
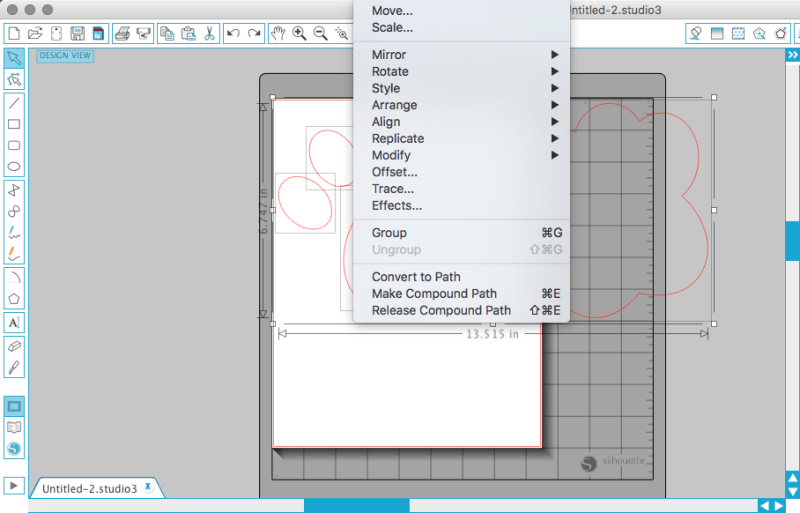
The paw print pattern allows you to cut your design in two separate pieces – the paw pads and then an overall background. To cut these as separate colours, you’ll need to ungroup your design to create two separate elements.
To ungroup your design:
- Using your mouse, highlight your entire design, or choose “Edit > Select All”
- Now go to the “Object” drop down menu and select “Ungroup”
Delete the background paw print from your layout.
(I opted to add Lacey’s name to my cut layout and moved it so as not to waste vinyl.)
Step Three: Cut Your 1st Pattern
Adjust your ratchet blade and cut settings in Silhouette Studio® to coincide with the adhesive vinyl and click “Send to Silhouette” to send your cut file to the Silhouette CAMEO®.
Step Four: Cut Your 2nd Pattern
- This part is easy, simply go to the top of your Silhouette Studio® page and select the undo arrow from your toolbar.
- Click the undo arrow until you are back to the point where you had two paw print images – this time you will delete the paw pads and keep the background.
*Note: do not resize your image; right now it should be sized to match the pad image perfectly.
- Set up the second sheet of adhesive vinyl onto your cutting mat and send your image to the Silhouette CAMEO® for cutting.
To position your design:
- Remove the excess background vinyl from your paw and paw pad images.
- Apply Silhouette adhesive tape to the paw pad image and press in place with your scraper.
- Peel the adhesive tape from the waxed paper – your adhesive vinyl should stick to it.
- Carefully position your paw pad over your paw background image. Once centered as you like, press down to adhere.
Step Five: Apply Your Image
- Lift your adhesive tape, which will now hold both the paw pads image AND the background image, and place it on your pet food container.
- Smooth your image out to remove any bubbles and remove the adhesive tape.
Step Six: Create A Hook
- Thread your plastic cable tie through your pet food scoop and snap it closed to the first or second line – not all the way. We want to leave an open loop here to hang from our container.
Step Seven: The Command Hook
- Attach a command hook to the side of your pet food container and hold in place for 30 seconds for a firm grip.
Now hang your scoop right next to the food!
So simple, so cute, and a decorative way to keep your pet food in plain sight.
And the a$$ tattoo?
Yup, the CAMEO® and a henna marker can do that too!
You didn’t really think I’d photograph my butt did you? I want the job, but not the ‘exposure’. Lol
Have a great one (and wish me luck!)


