Did you know that you are “supposed” to re-caulk your shower/tub about every 5 years? I’m not sure who set the rule and deadline – but if my shower was any indication, it seems an accurate timeline for this chore.
Ewwwww!!
The close-up makes it look only slightly worse than it was, but even the pink areas are signs of mildew forming on the existing caulking. It doesn’t get much clearer than this that it’s time to re-caulk your shower.
I picked up a few supplies at my local home improvement store: the silicone caulk remover isn’t necessary, nor is the caulking scraper – most of the caulk removal can be done with a utility knife.
The caulking itself is really important though. Don’t use caulking you’ve had tucked away in your garage or basement for years. Caulk does have an expiry date, even if it’s still sealed, and using it beyond that date is risking water damage because of poor adhesion.
I used about 1/2 of a tube of caulking, which cost about $8 CDN, so you aren’t breaking the bank to start fresh and new.
Using your utility knife, slide the blade along the walls to break the seal between the old caulking and the surface.
I tried the scraper you see above, but the utility blade did a much better job. Please be careful with your hands though – I probably should have been wearing gloves using a bare blade like this.
Pull as much out as you can by hand.
You can see the mildew had penetrated right through the old seal and into the grout below.
Double EW!
I went over the seams with my utility knife to see if I could dig out any extra caulking and remove as much mildew as possible that way.
Then I brought out my HomeRight Steam cleaner and blasted the rest away with scorching steam.
I have read that you can use a capful of bleach, but then I’ve read other articles that said that bleach does not kill mould? I’m not sure which is accurate?
Regardless, bleach wouldn’t have been able to penetrate the vertical seams, so scraping and steaming was necessary.
Make sure you remove every smidge of the old caulking – and I mean every smidge, the new won’t adhere over the old.
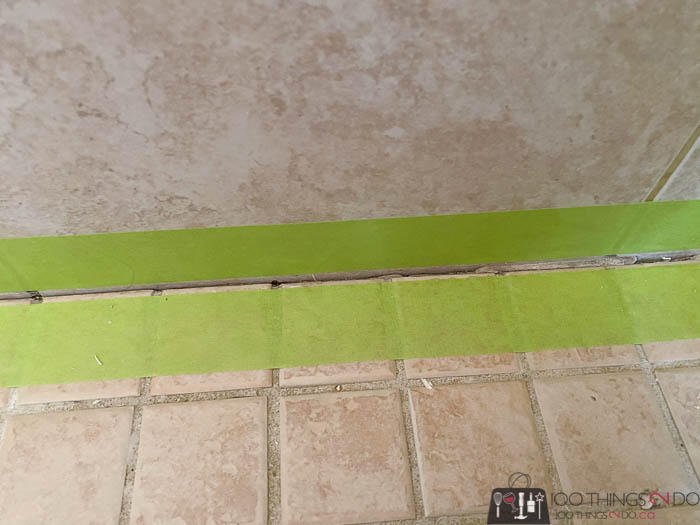
Let the area dry for at least 2 hours and then apply painter’s tape 1/4″ on either side of the seams.
Look how clean my crack is!! (come on, I’ve written the word “caulk” here without one single lewd comment – that’s a record!)
But it is really clean, which means I’m off to a great start for re-caulking my shower!
The painter’s tape is key here people! I’ve used caulking for other projects and I’ve made a total disaster of a mess in applying and spreading it properly. Shower caulking is particularly sticky and difficult to remove, so using the tape will save you a giant headache later.
Cut your caulk tube with your utility knife and make sure to pierce the inside seal with the long pin underneath your caulking gun.
Holding your caulk gun perpendicular – not at a 45º angle, squeeze the caulk in a smooth, thin line into the seams. The act of holding it perpendicular allows more of the silicone to get into the grooves versus sitting on top of them.
Use your finger, or a caulk spreader, to lightly and evenly push the caulk into the crevices and smooth the joint. (see video)
While the caulking is still wet, carefully remove your painter’s tape.
So fresh, so clean, so mildew-free!! I actually feel cleaner showering in here now. 😂
And good for another 5 years!
Save for later:
Used in this project: (Amazon affiliate links. For full affiliate disclosure, please see sidebar or bottom of the page)
I think I’ve said “caulk” more times in the last two weeks (windows, wainscoting and now the shower) than most porn stars?!
I guess I just can’t get enough? 😂. (Sorry Dad)
Have a great one!


