
A repurposed panel from an old nightstand, some decorative knobs and a bit of paint are all you need to create a pretty bathroom vignette with this simple raised tray.
I’ll start this post by apologizing. I am not an interior designer, nor am I a professional stager or even photographer – which means that more often than not, my photos don’t do the project justice. I’m working on it, and practice makes perfect, but believe me when I say these simple raised trays are SO CUTE IRL – you’ll want to make dozens.
Which is great, because they are so simple.
Do you remember the nightstand I made over a few months ago? It was dated and ugly and had panelled doors on the front of it? I held onto those doors all of this time knowing that at some point I’d get around to making raised trays for my girls.

Do you see it? Can you visualize the potential here?
The trim work around the edges is calling out to become the lip of a decorative tray – holding all your pretties in a neat and tidy vignette.
But they needed a bit of work first (don’t worry, not much)
I removed the metal detail from the centre of each cupboard door and filled the holes with wood filler. I also removed the hinges and the metal magnets from the back of the panels, then I sanded everything smooth. You don’t need to go down to bare wood if you are painting, just sand it well enough to remove any and all oils and furniture polish as well as the top coat of varnish from the doors.

A friend (thank you Kari!) gave me some adorable knobs she found on sale somewhere and I knew they’d be the perfect touch of whimsy for my simple raised trays. I pre-drilled small holes in the back of the doors (less than ¼” deep) and the width of the screw that was on the back of the knobs.
Using a metal cutting blade I carefully cut the screw on the back of each knob so that it was approximately ¼” long.

I forgot to photograph the painting process, so you’ll just have to take my word that I primed and painted the simple raised trays in white. lol
Once both sides of each vanity tray were painted with 1 coat of Zinsser Bullseye 1-2-3 primer and 2 coats of Benjamin Moore’s Advance paint (with a light sanding with 320 grit between coats) it was time to insert the knob feet. I used a bit of Gorilla Glue clear
on the end of each screw and then tucked each knob into the pre-drilled holes. *These links are affiliate links to products I used for this project. For full affiliate disclosure please see sidebar/end of article.

Aren’t those knobs fantastic!
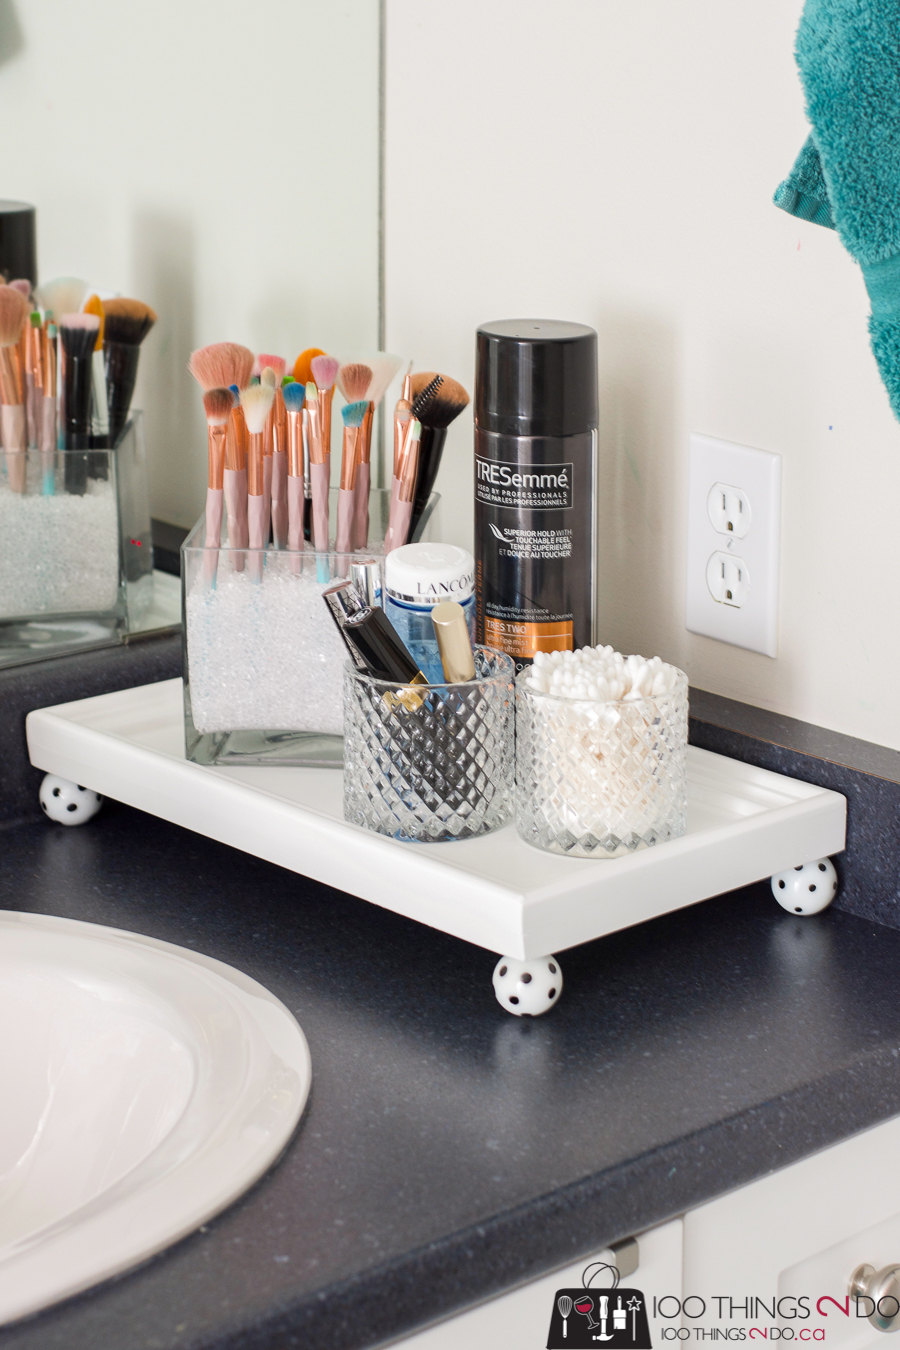
Perfect for Miss Maddie’s bathroom which is already done in black and white.
Here’s where you’ll see why I apologized in my opener….
I tried 10 different ways to style this simple raised tray to create a visually appealing and pinnable vignette – but I don’t think I hit the mark.

Like the colours, but not enough variation in heights right?


Brought in a bit more height for this simple raised tray vignette, but now the flowers are too white and washed out.

Better plant, better proportions… still something off.

This is a bit more realistic – I brought in Miss Maddie’s makeup brushes and mascara to create this cute vignette.

Miss Chloë, on the other hand, isn’t into makeup or cute tray vignettes, but she is an avid sewer – so I took her raised tray and put it near her sewing machine with her “needies” close by.

Chloë’s raised tray was finished with these pretty mercury-glass-looking gold knobs. Same technique, but a different look in the end.

Who would have thought that the most difficult part of the “simple raised tray” DIY would be putting stuff on it once you’ve finished?
Ugh!
Regardless, I hope I’ve shown how quick and easy it is to make a great storage, organization and aesthetically pleasing decor piece for your home – with minimal time, money or effort!
Have a great one!