I’m breaking down the process I used to build these home office built-ins so that you can easily replicate it in your home. Part 2 upper cabinets and bookshelves.
*This is a #sponsored post. I was provided with product and payment in exchange for providing my use and experience with DAP® Canada products. As always, all opinions are sincere and my own.
For the other tutorials, click any of the links below:
Part 1 – base cabinets
Part 2 – upper shelving
Part 3 – doors, drawers and paint
Have you been waiting with bated breath for part 2 of my DIY home office built-in shelves tutorial?
We left off at Step 10 in the “Part 1 Lower Cabinets” blog post, so I’ll continue on from there.
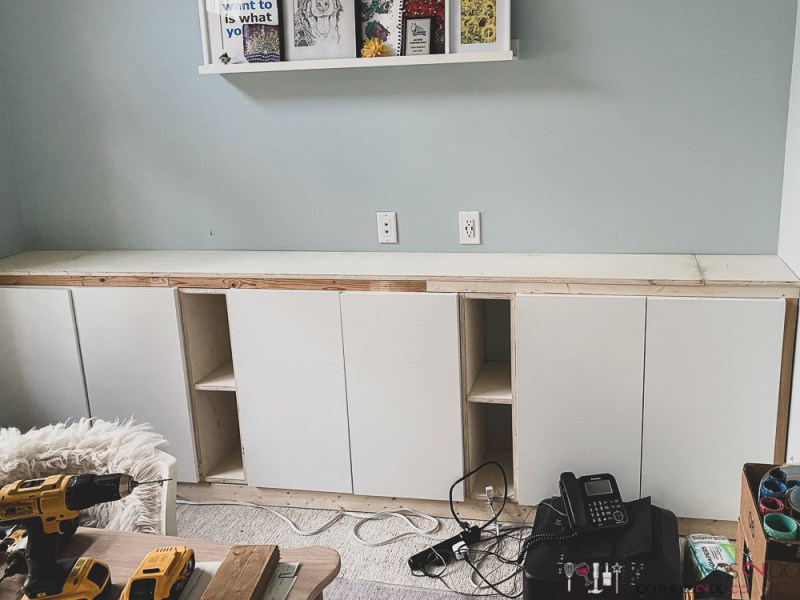
Your base cabinets for your DIY built-ins are installed, level, plumb, attached to studs in the wall, and any wiring you needed moved has been moved at this point.
Step 11
Cut your 2″x2″ boards so that they run from the top of your counter to just shy of your ceiling. This is to provide space for doors and drawers to open freely and to give a nice straight edge to trim out later. The 2×2’s should line up flush with the counter front. Attach these to studs in the wall using 3″ screws, or if they aren’t lined up with a wall stud, use heavy weight wall anchors. We don’t want these pulling out from the wall and allowing the attaching cabinetry to sag or shift.
Step 12
Keep or skip this step, but I’m including it so you have the option; I knew I wanted some drawers for staplers, cords, stationary etc. and I knew I liked the look of drawers separating cabinet fronts (so it looks less “kitchen-y”. To achieve this I built two 3-sided boxes out of plywood. The boxes were built to the depth and width of the cabinet frame, so that the cabinet would rest directly on top. Using pocket screws and wood glue, I assembled the top and two sides of each box, and used pocket holes/screws to attach the sides to the counter. It is VERY IMPORTANT that your boxes are perfectly square. Drawer installation can be a beast if you are out even 1/8th of an inch.
Step 13
Place your upper cabinets on top of the boxes you’ve just installed and attach to wall studs through the back, using 3″ screws. Check for level and plumb.
Step 14
At this point all of my pre-made cabinetry was in place. The rest of my DIY built-ins consist of open shelving so the measurements – widths and heights – were up to me to decide. I measured the opening between the cabinets and then divided it into 3 equal sections. Symmetry is the key to interior design, so it was important that my spacing vertically and horizontally was consistent.
You can see in the above photo that my shelves are lined up with the centre seam of the bottom right cabinet, and finish at the edge of the lower bookshelf. This allowed for the section above the centre base cabinet to remain open for plugs, pictures etc.
I built my DIY built-in bookshelves from the same ¾” plywood I’d ripped down to width in Part 1. I went with 14″ spacing between each shelf. The shelves were attached with wood glue and pocket hole screws which I tried to hide – lower shelf has the holes on the underside of the shelf, upper shelves have the holes on top of the shelf. They’ll all be filled in the end, but a bit of pre-planning makes life easier. You’ll also notice that there is a small ¾” x 2″ strip of plywood on the underside of the top shelf; this is to give the shelf rigidity and to give you a place to attach the upper shelving to the wall studs.
Step 15
Repeat on the other side.
At this point your bookshelves are flush with the side cabinets and attached via the back to the studs in the wall. All that’s left to do is attach the bookshelves to the countertop and to the cabinets themselves. You can use wood glue to attach to the counter section, but I had pre-drilled pocket holes where they wouldn’t be noticeable and attached them with pocket screws. Another screw or two from inside the cabinets into the bookshelf will keep everything sturdy and strong.
Please forgive the chaos in the room – because this build took longer than it should have (I was terribly intimidated) I was using my home office during construction of these DIY built-ins.
Step 16
Time for your upper bookshelves!
You can pre-build this in the garage and then carry it in and install, but because I was working along I found it easier to built them in place.
I patched together three 10′ lengths of ¾” plywood that would run the length of the wall. These are held together with wood glue and pocket screws. I made sure the seams would be hidden above the bookshelves and attached the first one to the lower units with 1 ¼” screws.
Step 17
I cut my side boards to match the spacing of the lower bookshelves and pre-drilled pocket holes in each one. In my case this was 10 boards at 13 ¼” tall. Make sure you pre-drill the pocket holes on the proper ends of your cut boards.
Step 18
Line up your vertical boards with the verticals in the lower shelves and glue and screw into place. Lay your second 10′ length of plywood over top, check for square and use pocket screws to attach the verticals.
Repeat for the DIY built-in shelf above (I changed up my spacing to line up with the base cabinets.)
Step 19
Run a 4th 10′ length of ¾” plywood across the top of your home office built-ins to close the gap between your build and the ceiling. I placed scrap 2×2″ boards, with pocket holes on either end, screwed into studs on the back wall and running on top of the bookshelves to give me something to screw into.
Step 20
It’s time for trim!!
I purchased some 1″ mdf (medium density fibreboard) for some of my trim work, but you really don’t need to outlay the extra cost. If you still have ¾” plywood leftover from building all of your shelves, you can rip these down on a table saw to 1″ widths. (or 1 ½” widths depending on how wide you want your trim)
Cut your verticals to size and attach to the shelf fronts with wood glue and 1 ¼” finishing nails.
Cut your horizontal pieces to length and attach the same way. Aim for no gaps, but if there are some, and there certainly will be, don’t worry – there’s a DAP for that!
The piece of trim framing the counter section is another piece of ¾” plywood cut to 2″ wide to hide the front of the plywood counter AND the 2×2 board underneath.
Step 21
Trim out the sides – by the walls – with mdf or ply – but these will be custom cut to fit the space, and some of it will depend on wether your cabinet doors open flush or require a bit of extra room for the hinges. (Mine opened flush so I only need a 1/8″ gap between the cupboard door and the trim piece)
Step 22
Time to fill in the nail holes on the trim work and clean up the plywood edges.
Below you’ll see how I finished the raw plywood edges of my drawer fronts – but I did the same with the plywood trim pieces/face frame on my DIY built-ins. Get a good dollop of DAP Wood Pro All Purpose Wood filler and rub it into the visible edges of your plywood. You can use a putty knife if you want, but I found my finger was better able to really push the wood filler into every nook and cranny.
Likewise, DAP Wood Pro will fill in any nail holes and small gaps in your trim work – don’t use caulking for this part! Wood Pro is easily sandable and takes paint beautifully so this is the product to use at this point.
DAP® WOODPRO® All Purpose Wood Filler is a high quality, latex-based wood filler formulated to create a surface and body that looks and acts like real wood. It can be used to repair cracks, gouges, holes and other surface defects on furniture, woodwork, moulding, cabinets, panelling, plywood, windows, doors and painted surfaces. This easy-to-use filler is low in odour and cleans up with water. The thick, knife-grade formula can be moulded and sculpted making it ideal for corners, vertical and unsupported surfaces.
When I approached DAP about working together on my home office built-ins, I sent them the photo in Step 19.
It really made me laugh when I opened my package from DAP and found this much WoodPro inside! 😂. Yes, I needed help, but not quite this much! lol
Regardless, I’m very, very grateful and I did end up using over half of one container to fill in all the nooks, crannies and pocket holes for a smooth, seamless finish.

Pocket hole you say? Why yes, you can buy the little dowels that fit into the pocket hole slots and then use DAP WoodPro to fill in the remaining gaps OR, you can do what I did and skip the dowels altogether and just fill in every visible pocket hole with DAP WoodPro. Trust me, option 2 is so much easier AND the holes will be completely invisible after sanding.
Step 23
This will be the last step of the day. Too much is overwhelming and if you’ve built your shelves and trimmed them out – you deserve a rest.
Introducing DAP ALEX FLEX® Premium Molding & Trim Acrylic Latex Siliconized Sealant:
High-performance sealant specifically formulated for use on molding and trim applications. It delivers excellent adhesion and flexibility for a crack proof seal.
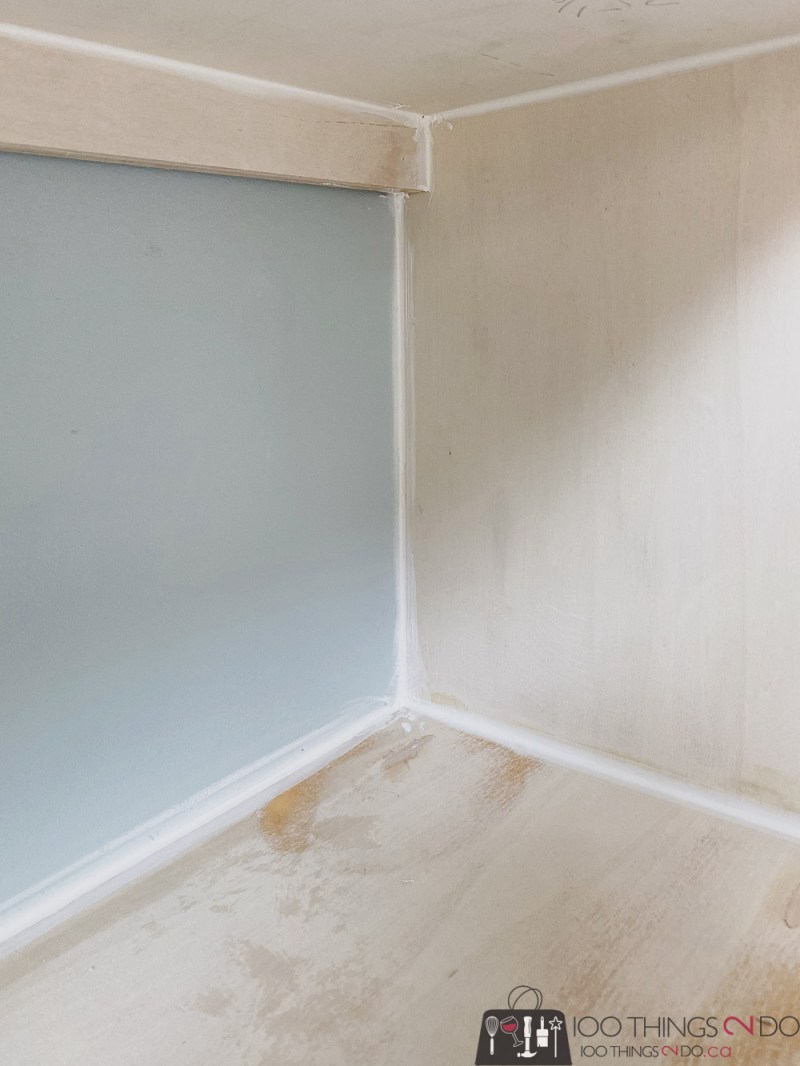
Alex Flex is the difference between this:
and this:
(Granted, I’m terrible at caulking).
The bead above is WAY too much caulking – you won’t need nearly that much – but if you do happen to do overkill like I did, a wet paper towel will wipe off the excess.
Once you’ve caulked inside the shelf sections, remember to do the outside edges where your DIY built-ins meet the wall, baseboards and ceiling.
That’s it for today guys! GREAT work!
Part 3 will be door (shaker) trim drawers and then the best part – PAINT!!
Have a great one!


