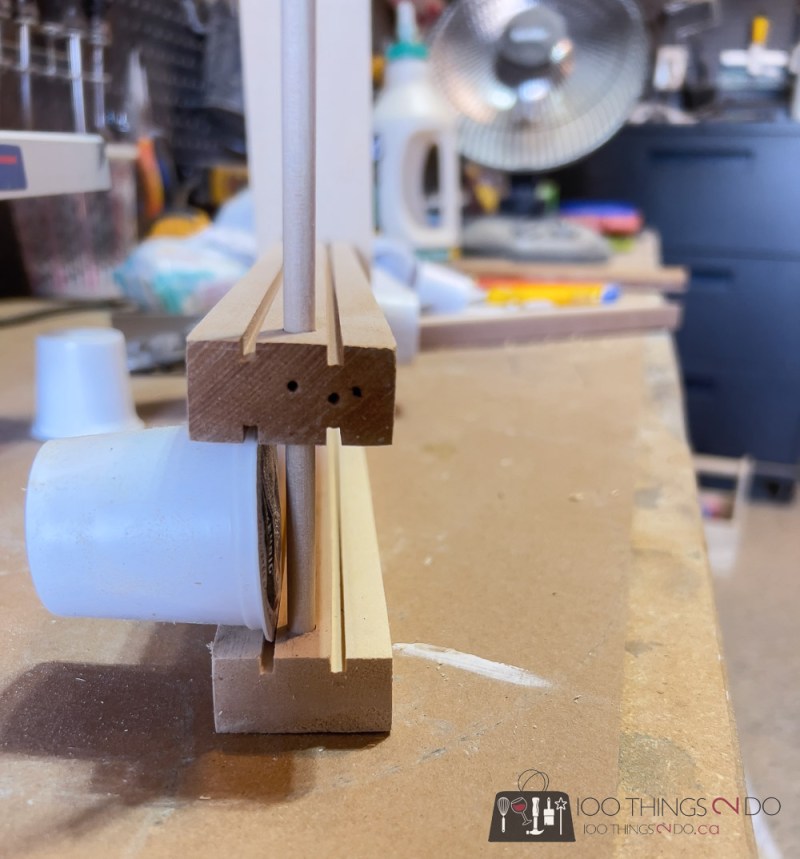
There are so many K-cup (Keurig/coffee) pod organizers out there that there’s one for just about every need. But none of them hold very many pods. Today I’m showing how I whipped up this K-cup holder that holds 28 pods, but can very easily be amended to hold even more – in a very tiny footprint.
Have I got an idea for you today! This project takes 4 scrap pieces of wood and about 30 minutes of your time – and it is FANTASTIC!
K-Cup Holder
(3) ¾” wood cut to 1 ½” wide by 12 ¾” long (columns)
(1) ¾” wood cut to 2 ½” wide by 5 7/8″ long (base)
(1) ¼” dowel
Once you have your wood pieces cut to size, lower the blade on your table saw so that it is the height of the lip of your k-cups – which is approximately 1/8″
Set the rip fence on your table saw to ½”.
Carefully, and using a push stick, run your 12 ¾” boards over the blade. Turn the board 180° and run it over the blade again. This will give you two slots cut into your wood.
Repeat this on board 2. For board three, you’ll want to do this on BOTH sides – this will be the centre column of your k-cup holder.
Mark the centre point of one column – about ½” from the end. Stack all three columns and drill a hole through all three at the same point.
This is the best time to sand your K-cup holder – before assembly – so I went over the 4 boards with 120 grit, then 220 grit sandpaper.
Using wood glue and 1 ¼” wood screws, attach the first column to the edge of your base board – the hole should be at the top. I tacked it in place with finishing nails, then came back and pre-drilled holes up from the bottom before screwing it together. Below you can see it tipped on its side.
Glue and screw your second column at 2 ½” from the same edge. This will be the column with both sides slotted. I tested the spacing by bringing out some coffee pods.
Glue and screw the final column at 5 1/8″ from the same side (which should have it just about flush with the edges of the base)
Thread your ¼” dowel through the holes at the top of your k-cup holder columns. Cut off the excess dowel using a utility knife. I dabbed a bit of wood glue at each dowel hole to help hold the dowel in place.
That’s it! Your coffee pod holder is done!
File one side, both sides, all four sides… go coffee crazy! If you have more than one flavour and you want to be able to tell them apart easily, just mark the ends with a sharpie marker, or add a label to each column.
This takes up 2 ½”x 5 7/8″ on your counter, so almost no space at all. Stand it next to your Keurig machine, or tuck it into a cupboard next to your mugs.
I just noticed I took the photos without cutting the extra bit of dowel off. 🤦🏻♀️ How embarrassing – I apologize.
Click over to @100Things2Do.ca on Instagram and see how easily the coffee pods slide in and out of the k-cup holder.
I’m so pleased with how this turned out – and that it was SO EASY to make!
Amazon affiliate links (just in case you don’t want to build your own)
Have a great one!


Or, you could just use a measured spoonful of coffee from a paper bag, and save the problems of having to dispose of your plastics.