In case you didn’t read yesterday’s post, I’ll recap:
This gallery wall is what I’m trying to make (for a friend, so you won’t see my name in there):
Yesterday I showed how I made all of the individual scrabble tiles and today I’m going to show you how I made the antiqued / rustic / farmhouse signs.
You’ll notice that the signs all have a dark undertone and a white overlay; you can achieve this by either painting your boards white and then hand-painting your lettering over top – or, if you have less than perfectly steady hands, you can do what I did and cheat:
I started out with my boards cut and sanded down to size. I beveled the edges on the “Blessed” sign by just running my sander along the edge a few times.
I coated all of the boards with the same stain that I used for the scrabble tiles to keep the flow of the gallery wall consistent. Note: Different woods take the same stain differently, so you will notice shades and highlights – but that’s what gives it it’s depth and character.
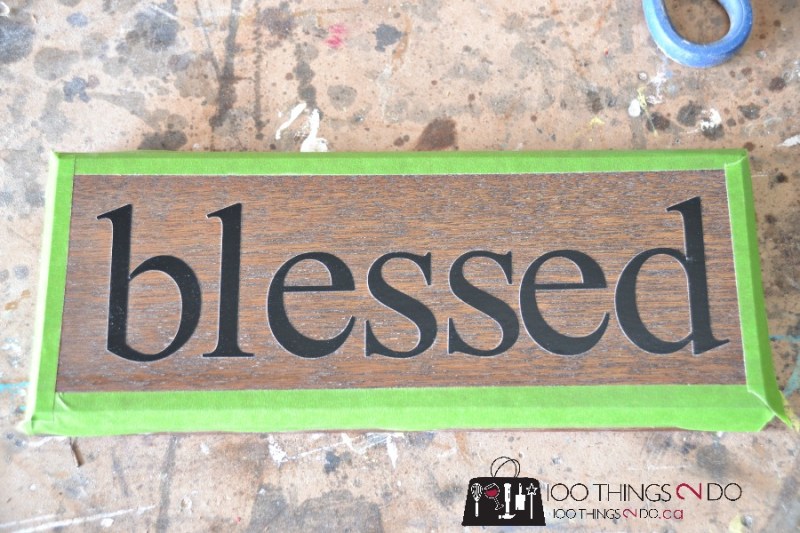
While the stain dried (overnight), I cut – or my Silhouette cut – out my letters on adhesive vinyl. I knew I had 4.4″ by 10″ to work within, so I sized the word together (as opposed to each individual letter) to fit that space.
I also wanted a small frame around the word blessed, so I marked in from the edges 1/4″ and lined up some painter’s tape.
This next part is KEY – use an almost-dry paintbrush, sponge or roller to apply the first coat of white. (I used Behr’s Crystal Cut)
The first coat is where the paint might seep under the letters – but if you brush/roller is almost dry, there won’t be enough paint to bleed under – and your letters will peel off crisp and clean.
Once that’s dry, apply additional coats as you choose.
I peeled off my letters (using tweezers) while the last coat of paint was still wet.
Now comes the part that I hate – the “antiquing” or giving your farmhouse signs the “rustic” look… after all of that work to make sure your stain is perfect, your paint doesn’t bleed and your letters are crisp – I HATE scratching it all off!
It’s like spending an hour on hair and makeup and then washing your face before going out.
I will admit, it does look good – IF you aren’t the one doing the work.
I used a 320 grit sandpaper and roughed up the surface of the sign, exposing the underlying stain here and there.
I sent some photos to Rita to see if it was “distressed enough” and she asked for more…. so I’m going to have to deliver these with a piece of sandpaper attached – I just can’t do it. (that’s the sound of my heart breaking that you hear)
I added a coat of satin varnish to each sign – to make the stain rich and to ever-so-slightly yellow the white paint.
Don’t get stuck on the idea that your farmhouse signs have to be white on stain – switch it up and use coloured stain, or coloured paint and make your signs more “coastal” or “whimsical”. Invert the light and dark and try adding colours to the edges:
[fusion_builder_container hundred_percent=”yes” overflow=”visible”][fusion_builder_row][fusion_builder_column type=”1_1″ background_position=”left top” background_color=”” border_size=”” border_color=”” border_style=”solid” spacing=”yes” background_image=”” background_repeat=”no-repeat” padding=”” margin_top=”0px” margin_bottom=”0px” class=”” id=”” animation_type=”” animation_speed=”0.3″ animation_direction=”left” hide_on_mobile=”no” center_content=”no” min_height=”none”]
Tomorrow I’ll show you how easy framing these pieces was – but for now – Step 2 complete!
Make your own farmhouse signs;
Supplies:
Have a great one!
 [/fusion_builder_column][/fusion_builder_row][/fusion_builder_container]


Great job! What type of wood was used?